For every 500 hours working,you need to do maintenance,include change engine oil,replace oil filter cartridge ,replace fuel filter cartridge and change water jacket and radiator interior.
Related Contents:
Takeuchi Excavator Workshop EPC+Service Manual 2018 PDF Files
2022 Kubota Takeuchi Diagmaster v22.08.01 v4.1.2 Software Free Download
Kubota EPC Spare Parts Catalogue 2021.06 Download
Change of Engine Oil:
CAUTION
• Make sure that you stop the engine before you change the engine oil.
1.Start and warm-up the engine for approximately 5 minutes.
2.Put an oil pan below the engine.
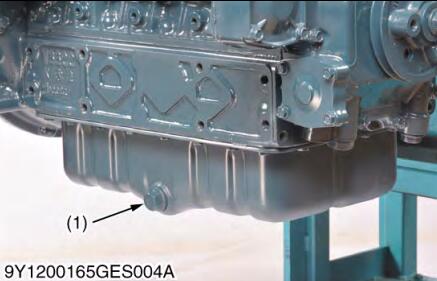
3.Remove the drain plug (1) at the bottom of the engine and drain the oil fully.
4.Tighten the drain plug (1).
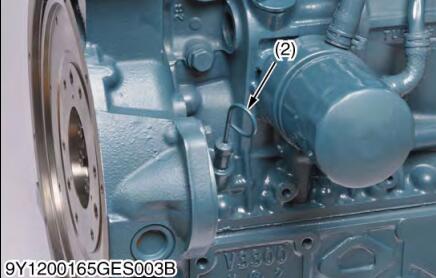
5.Fill new oil until the upper line on the dipstick (2).
IMPORTANT
• When you use an oil of different brand or viscosity from the previous, drain the remaining oil.
• Do not mix 2 different types of oil.
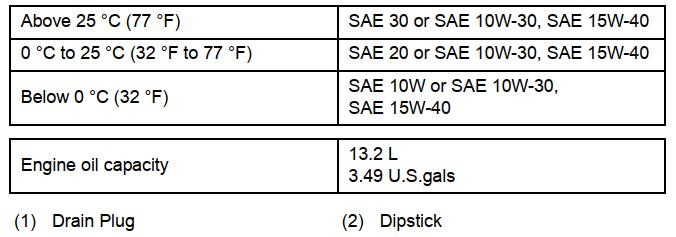
• Engine oil must have the properties of API classification CJ-4. Use the correct SAE Engine Oil by reference to the ambient temperature.
Replacement of Oil Filter Cartridge
CAUTION
• Make sure that you stop the engine before you replace the oil filter cartridge.
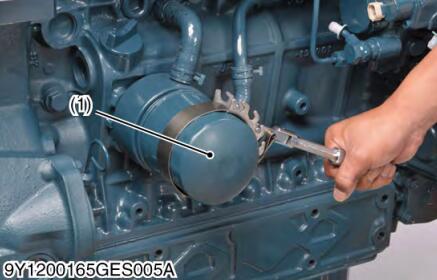
1.Remove the oil filter cartridge (1) with the filter wrench.
2.Apply a thin layer of oil on the new cartridge gasket.
3.Tighten the new cartridge by hand.
4.After you replace the cartridge, the engine oil usually decrease by a small level. Make sure that the engine oil does not flow through the seal and read the oil level on the dipstick. Fill the engine oil until the specified level.
Replacement of Fuel Filter Cartridge
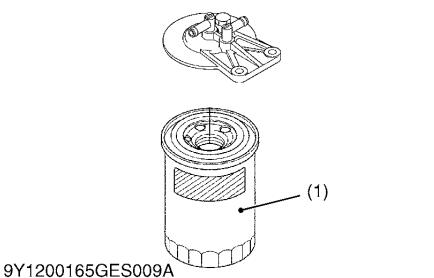
1.Remove the fuel filter cartridge (1) with filter wrench.
2.Apply a thin layer of fuel to the surface of the new filter cartridge gasket before you put it on.
3.Tighten the new cartridge by hand.
4.Open the fuel cock and bleed the fuel system.
5.Operate the engine for a while and check if there is not the fuel leakage from the filter.
Cleaning of Water Separator
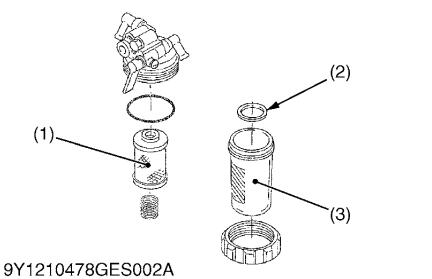
1.Remove and flush the filter cup (3) if the float (2) goes up with water, or the filter cup (3) has the dust.
2.Flush the element (1) with kerosene to prevent dust to go into the inner element (1).
3.After you replace, bleed the fuel system
Cleaning of Water Jacket and Radiator Interior
CAUTION
• Do not remove the radiator cap when the engine is hot.
Then loosen the cap slightly to release unwanted pressure before you remove the cap fully.
1.Stop the engine and let the coolant temperature decreases.
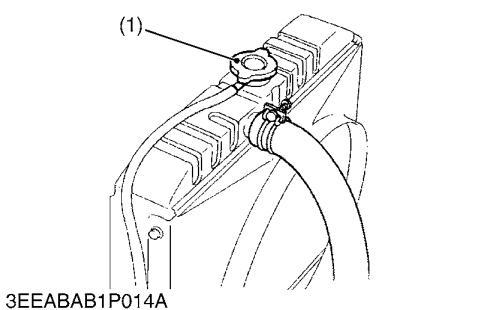
2.Remove the radiator cap (1) to drain the coolant fully.
3.Open the drain cock (2) and (3).
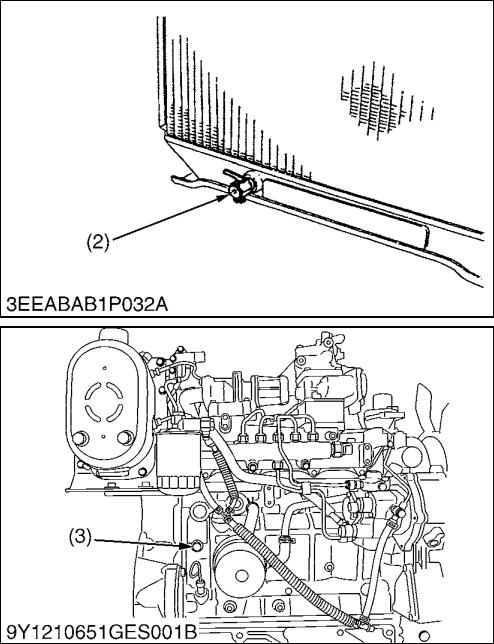
4.After you drained all coolant, close the drain cocks.
5.Fill with clean water and cooling system cleaner.
6.Obey the directions of the cleaner instruction.
7.After you flush, fill with clean water and anti-freeze until the coolant level is immediately below the port. Install the radiator cap (1) correctly.
8.Fill with the coolant until the “FULL” A mark on the recovery tank (4).
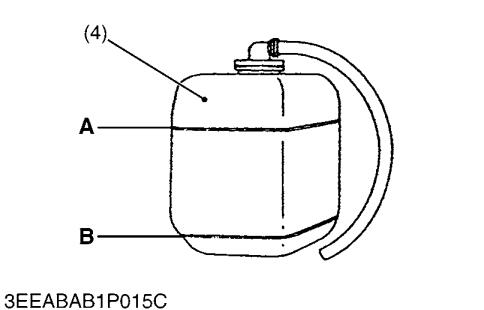
9.Start and operate the engine for a few minutes.
10Stop the engine and let the coolant temperature decreases.
Examine the coolant level of radiator and recovery tank (4) and add coolant if necessary.
IMPORTANT
• Do not start the engine without coolant.
• Use clean and soft water with anti-freeze to fill the radiator and recovery tank.
• Make sure that when you mix the anti-freeze and water, the ratio of anti-freeze is less than 50 %.
• Make sure that you close the radiator cap correctly. If the cap is loose or incorrectly closed, coolant can flow out and the engine can overheat. Cleaning of Water Jacket and Radiator Interior
Anti-freeze
• There are 2 types of anti-freeze available: use the permanent type (PT) for this engine.
• When you add anti-freeze for the first time, flush the water jacket and radiator interior with clean, soft water several times.
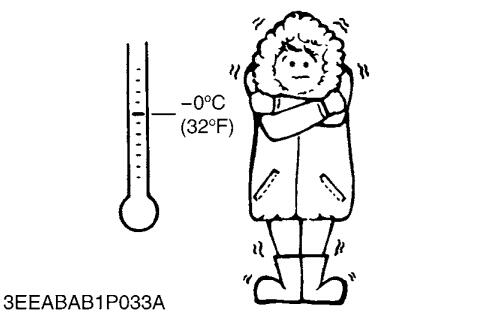
• The brand of the anti-freeze and the ambient temperature have an effect on the procedure to mix water and anti-freeze.
• Mix the anti-freeze with clean, soft water, and then fill into the radiator.
IMPORTANT
• Make sure that when you mix the anti-freeze and water, the ratio of anti-freeze is less than 50 %.

* At 1.01 × 100000 Pa (760 mmHg) pressure (atmospheric). Use a radiator pressure cap that lets the pressure collect in the cooling system to get a higher boiling point.
NOTE
• The above data is the industrial standards that shows the minimum glycol content necessary in the concentrated anti-freeze.
• When the coolant level decreases because of evaporation, add clean, soft water only to keep the anti-freeze mixing ratio less than 50 %. If there is a leakage, add anti-freeze and clean, soft water in the specified mixing ratio.
• The anti-freeze absorbs moisture. Keep new anti-freeze in a tightly sealed container.
• Do not use the radiator cleaning agents after you add anti-freeze to the coolant. Anti-freeze contains an anti-corrosive agent, which reacts with the radiator cleaning agent to make sludge and cause damages to the engine parts.
Replacement of Fan Belt
1.Remove the alternator.
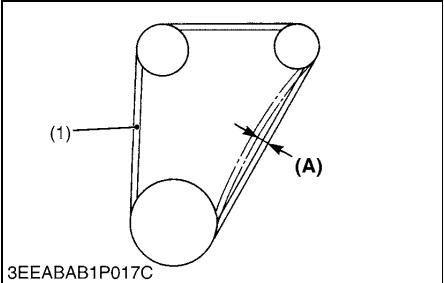
2.Remove the fan belt (1).
3.Replace the fan belt with a new one.
4.Install the alternator.
5.Examine the deflection (A) of fan belt.
