How to clean DOC Face Plug for Detroit Diesel by JPRO 2024 v3 diagnostic software.
Related Contents:
2024 JPRO Noregon Commercial Fleet Diagnostics Free Download
The DOC Face Plug Cleaning test is available on:
✓ Detroit Diesel EPA 10 to EPA 13 for all DD13, DD15, and DD16 engines
✓ Detroit Diesel GHG17 and newer with Engine Software Version:
| o App_040B | o App_040D | o App_040E | o App_0410 |
| o App_0411 |
and MCM Software Version:
| o mcm_0x06DB | o mcm_0x06DE | o mcm_0x06ED | o mcm_0x06F2 |
| o mcm_0x06F6 |
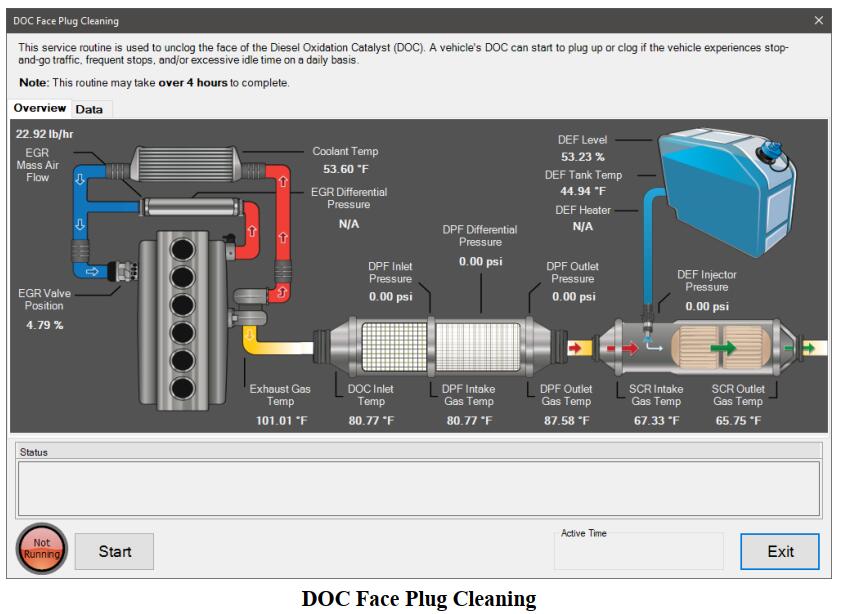
This test is used to unclog the face of the Diesel Oxidation Catalyst (DOC). A vehicle’s DOC can start to plug up or clog if the vehicle experiences stop-and-go traffic, frequent stops, and/or excessive idle times daily.
NOTE: This test may take over 4 hours to complete.
1 Select the DOC Face Plug Cleaning and press Enter or click the Start button.
2 If not previously shown, the Aftertreatment Instructions are automatically displayed to provide aid in diagnosing issues with aftertreatment systems. When read, select the Close button on the window.
3 The DOC Face Plug Cleaning dialog will be displayed.
4 To begin the DOC Face Plug Cleaning, press the Start button. You will be prompted to confirm that all appropriate safety precautions have been taken.
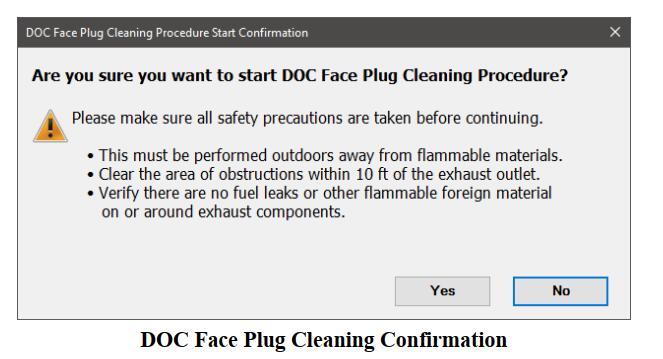
5 After confirming all safety precautions, click the Yes button. You will then be prompted to press and hold the regen switch on the dash for 5 seconds to start the DOC Face Plug Cleaning process.
6 The Start button will change to a Stop button and the lamp next to the button will indicate the test is Running.
7 As the test runs, status will be updated in the status window. The Active Time counter will indicate how long the procedure has been running.
8 Select the Data tab to view additional data related to the aftertreatment system. Click the checkbox next to any data item to add or remove it from the graph.
9 Once the procedure completes, the Stop button will change back to the Start button and the status will revert to Not Running.
10 Click the Exit button to return to the test selection dialog.
More topics about JPRO Diagnostic,please refer to:JPRO Diagnostics Guide