Here is the instruction show you guide on how to remove clutch assembly for Kubota L3901 tractor.
Related Contents:
2022 Kubota Takeuchi Diagmaster v22.08.01 v4.1.2 Software Free Download
Kubota EPC Spare Parts Catalogue 2021.06 Download
Clutch Assembly
1 Insert the clutch center tool (1).
2 Remove the clutch assembly (2) together with the clutch center tool.
(When reassembling)
• Direct the shorter end of the clutch disc boss toward the flywheel.
• Apply molybdenum disulphide (Three Bond 1901 or equivalent) to the splines of clutch disc boss.
• Insert the pressure plate, noting the position of straight pins.
• After docking the engine and the clutch housing case, assemble the outer parts, referring to the picture.
IMPORTANT
• Be sure to align the center of disc and flywheel by inserting the clutch tool set.
NOTE
• Be sure to align the center of disc and flywheel by inserting the clutch tool set.
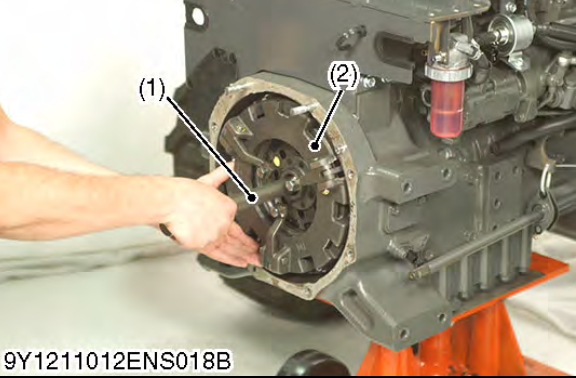
(1) Clutch Center Tool (2) Clutch Assembly
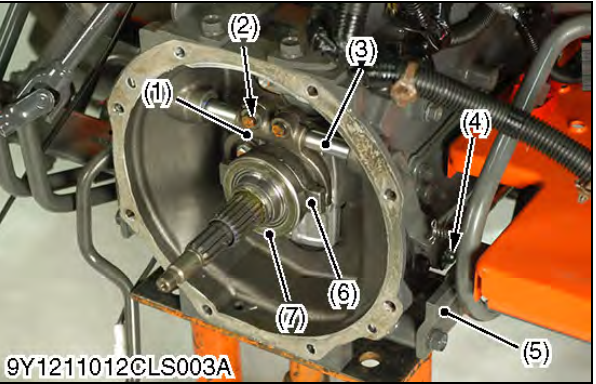
Release Hub and Clutch Lever
1 Remove the step brackets (5).
2 Disconnect the clutch rod (4) from the clutch lever (3).
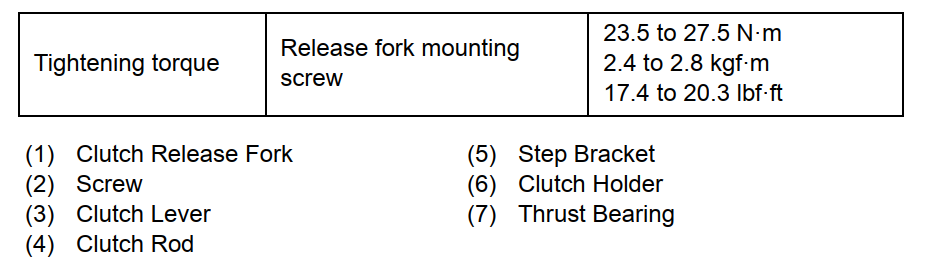
3 Remove the release fork mounting screws (2).
4 Draw out the clutch lever (3) and remove the release fork (1).
5. Remove the thrust bearing (7) and clutch holder (6) as a unit.
(When reassembling)
• Inject grease to the clutch holder (6).
• Make sure the direction of the clutch release fork (1) is correct.
• Apply grease to contact face of the clutch release fork and clutch holder.
• Apply grease to the clutch lever (3).
More repair case for Kubota,please refer to:Kubota Trouble Repair