Here is the instruction show step by step instruction on how to remove and install auxiliary control valve for Bobcat 3450 utility vehicle.
Related Contents:
Bobcat Engine Analyzer ECU DCU 2023
2023 Bobcat Service Analyzer 91.15 91.05 Diagnostic Free Download
AUXILIARY CONTROL VALVE Removal And Installation
Lower the lift arm and stop the engine.
Relieve the pressure from the hydraulic system.
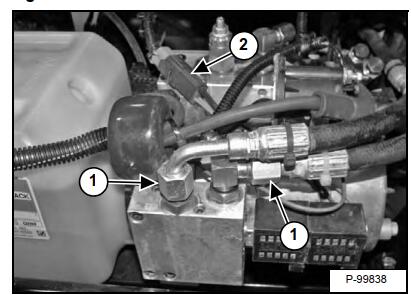
Remove the hoses (Item 1) from the auxiliary valve.
Disconnect the solenoid harness connector (Item 2) from the main harness.
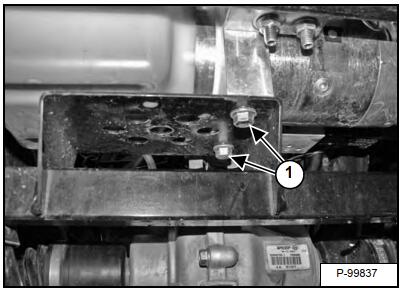
Remove the two bolts (Item 1) from the bottom of the hydraulic power unit.
NOTE: Removing the two mounting bolts will allow the hydraulic power unit to be moved to gain access when removing the auxiliary valve.
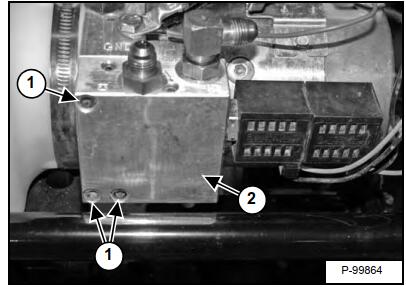
Remove the three screws (Item 1) and remove the auxiliary valve (Item 2) from the hydraulic power unit.
Installation: Tighten the screws to 16,4 – 17 N•m (145 -150 in-lb) torque.

Installation: Clean the surface (Item 1) and install new O-rings (Item 2) onto the auxiliary control valve.
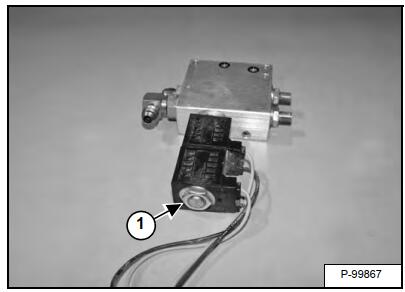
Remove the nut (Item 1) [Figure 60-40-5] from the solenoid coils. Remove the coils from the stems.
Installation: Tighten the nut to 3,9 – 4,5 N•m (35 – 40 inlb) torque.
NOTE: Mark coils for correct orientation before removing from the stems.
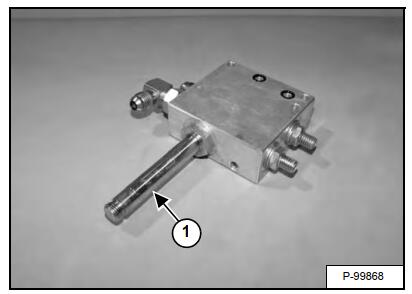
Remove the valve stem (Item 1) from the auxiliary valve.
Installation: Tighten the valve stem to 16,4 – 17 N•m (145 – 165 in-lb) torque.
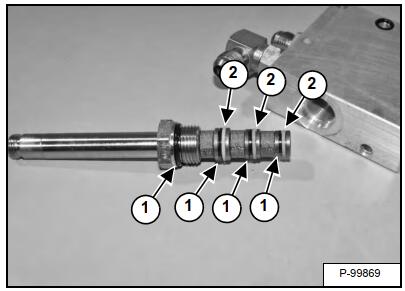
Remove the O-rings (Item 1) and back-up rings (Item 2) from the valve stem.
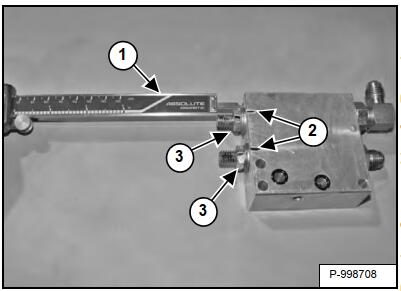
Place a mark on each of the relief valve set screws for orientation. Measure the how far the relief valve stems (Item 1) protrude from the auxiliary valve with a caliper (Item 2).
Loosen the nuts (Item 3) on the set screws.
Installation: Turn the relief valves in until the correct distance is achieved then tighten the nuts to 9 N•m (80 in-lb) torque.
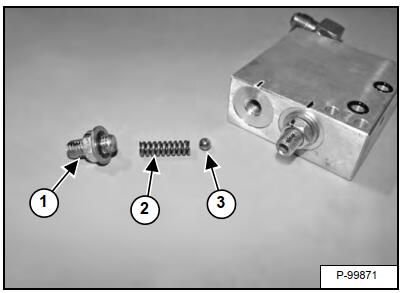
Remove the set screw (Item 1) [Figure 60-40-9] from the control valve.
Remove the spring (Item 2) and ball (Item 3) from the auxiliary valve. Check for wear or damage and replace as needed.
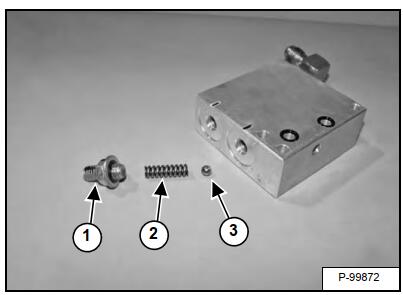
Remove the set screw (Item 1) from the control valve.
Remove the spring (Item 2) and ball (Item 3) from the auxiliary valve. Check for wear or damage and replace as needed.
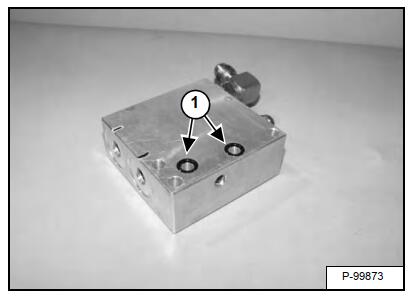
Remove the O-rings (Item 1) [Figure 60-40-11] from the auxiliary valve.
Installation: Install new O-rings
More repair topic for Bobcat,please refer to:Bobcat Excavator Repair