This instruction show you guide on how to adjust/display possibilities on machine with BOP for BOMAG BW177/213/226 roller.
Related Contents:
Bomag EPC 2021 2017 Electronic Parts Catalogue Free Download
Procedures:
Setting the machine type (BOP)
The machine type is set in the following sequence:
Note: Parameter adjustments can only be performed when the engine is not running.
Press key “?” to call up the screen page “MENU”. The following screen appears:
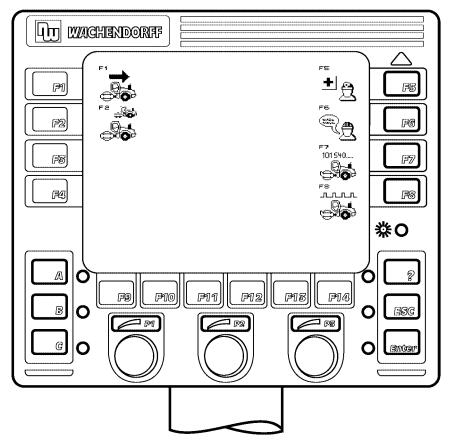
Press key “F2” to call up the screen page “Set machine type”. The following screen appears:
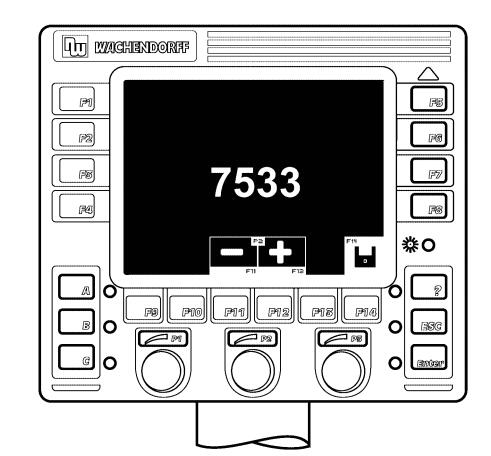
The required machine type can be selected by pressing keys “F11” and “F12”. (see list of machinetypes under item “List of machine types”).
After selecting the required machine type keep pressing key “F14”, until the symbol (F14) lights green for confirmation (approx. 4s).When releasing the key the screen will automatically change to the start screen and the control will reboot.
Switch the ignition off and on again.
BOP and MESX are now set to the new machine type.
Inverting the direction signal via the BOP control terminal
In dependence on the mounting position the axle sensor used delivers a 12 V output signal during forward or reverse travel.
In order to make sure that exciter position (only BVC machines) and printout correspond with the actual travel direction, it may be necessary to invert the direction signal.
Note: Parameter adjustments can only be performed when the engine is not running.
Press key “?” to call up the screen page “MENU”. The following screen appears:
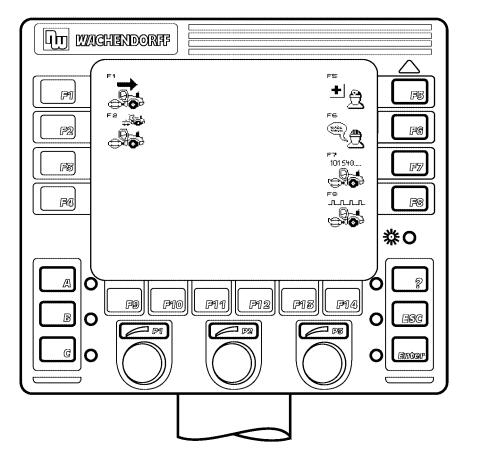
Press key “F1” to call up the screen page “Invert direction signal”. The following screen appears:
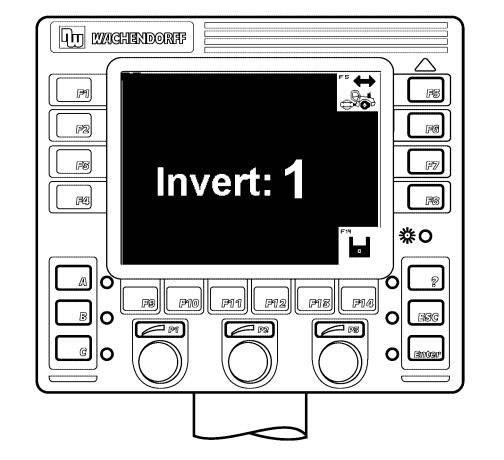
The direction signal can now be inverted or not inverted by pressing key “F5” (“Invert = 1” or “Invert= 0”).
After this change press key “F14” to save the setting. The symbol lights green for a moment as confirmation.
Press “ESC” to leave the page.
After this check on the printout or in the diagnostics menu whether the travel direction is now correctly recognized.
Calling up the diagnostics menu
Press key “?” to call up the screen page “MENU”. The following screen appears:
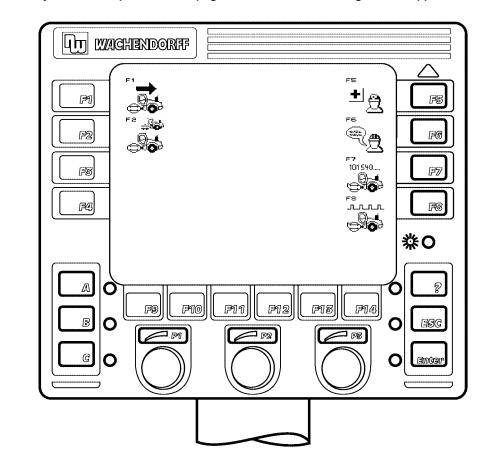
Press key “F5” to call up the screen page “Diagnose1”. The following screen appears:
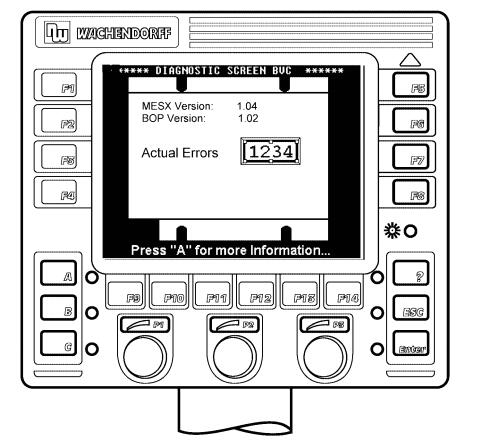
In case of a actually existing code the corresponding error code is displayed in the field “Actual Errors”.
Press “ESC” to leave the page.
Pressing key “A” brings you to a machine related, extended diagnostics menu (see below).
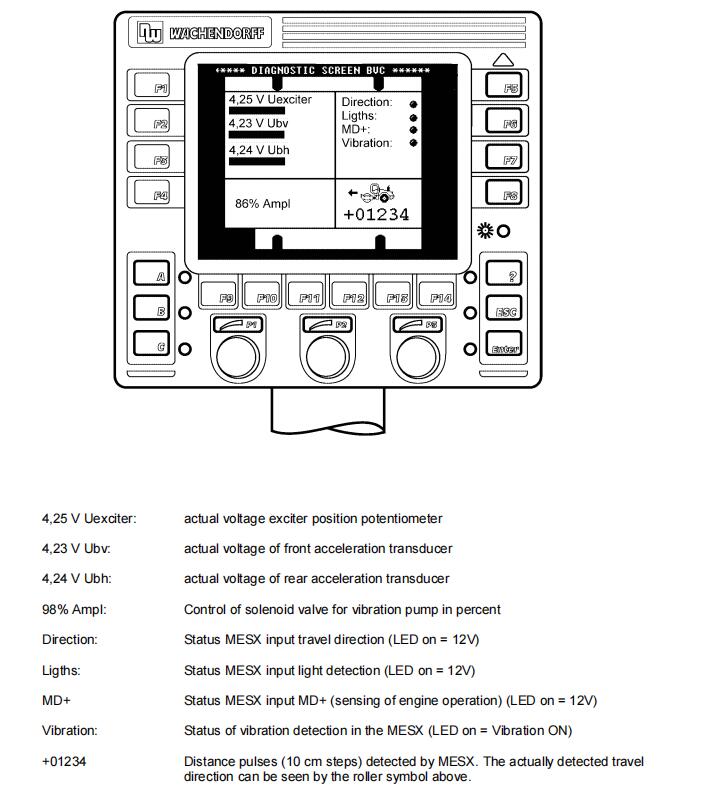
Extended diagnose for machines with circular exciter (BTMplus, BTMprof)
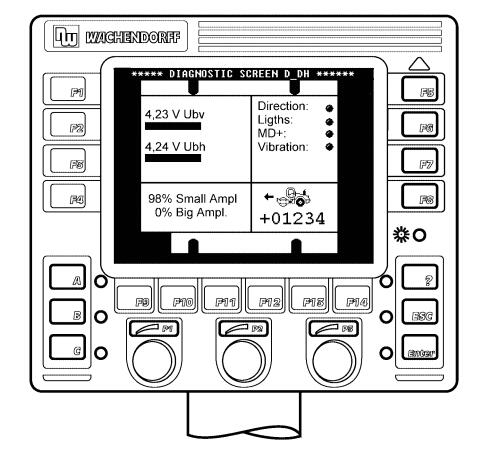
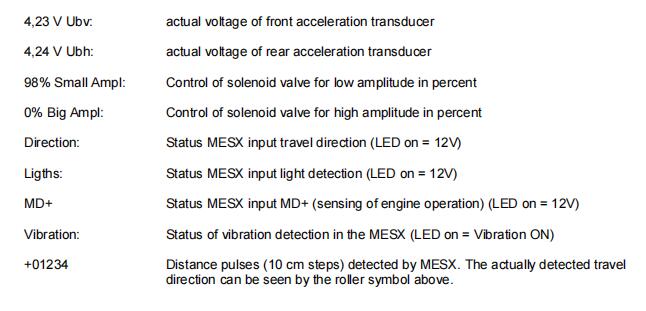
Extended diagnostics for BVC machines
Changing the printer language
Press key “?” to call up the screen page “MENU”. The following screen appears:
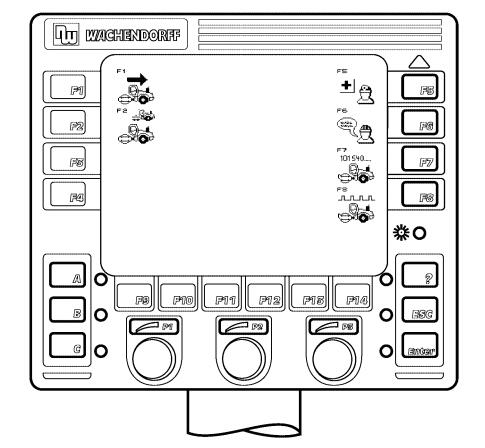
Press key “F6” to call up the screen page “Printer language”. The following screen appears
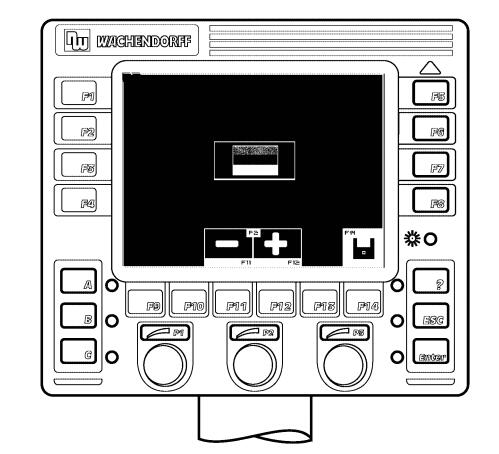
- The required printer language can be selected by pressing keys “F11” and “F12”.
- After selecting the required language press key “F14” to save the setting. The symbol (F14) lightsgreen for a moment as confirmation.
- Press “ESC” to leave the page.
Setting the machine serial number
Press key “?” to call up the screen page “MENU”. The following screen appears:
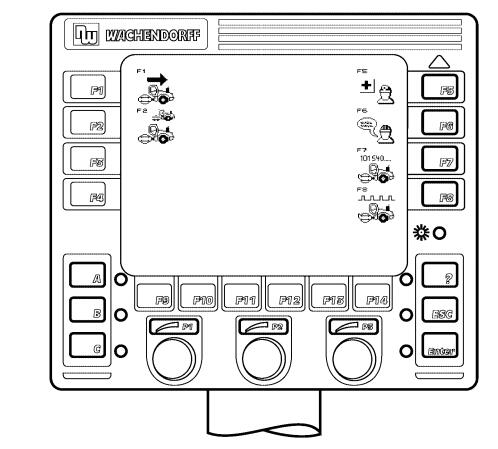
Press key “F7” to call up the screen page “Serial number”. The following screen appears:
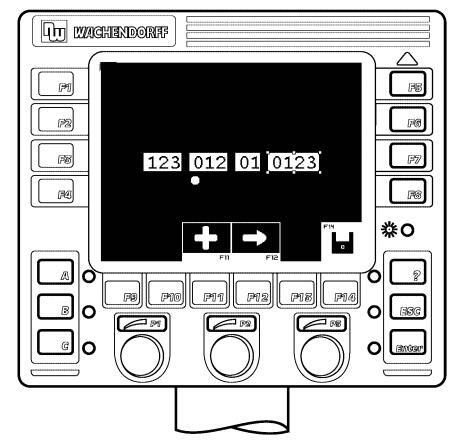
- The required serial number can be set by pressing keys “F11” and “F12”.
- After completing the setting press key “F14” to save the setting. The symbol (F14) lights green fora moment as confirmation.
- Press “ESC” to leave the page.
Teaching distance impulses
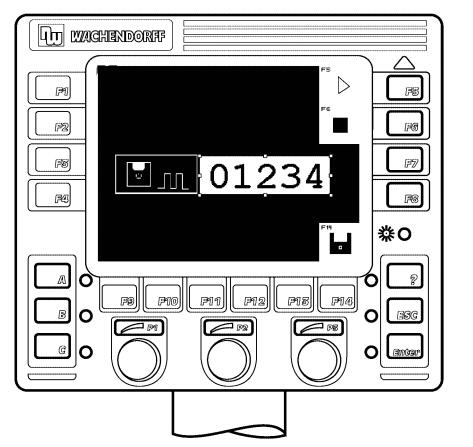
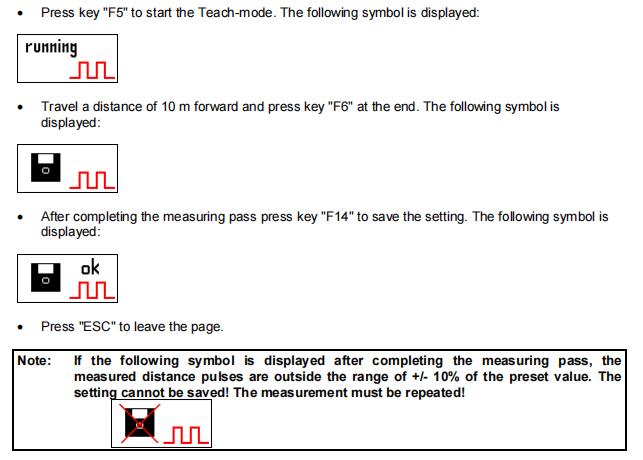
The distance impulses for the different machine types have already been set by the setting of the correct machine type. However, due to slippage of the rear wheels the detected distance measurement may differ from the actual distance travelled. In this case the distances impulses can be adapted accordingly.
Note: The distance impulses can only be adapted within the range of +/- 10% of the previously adjusted value.
Press key “?” to call up the screen page “MENU”. The following screen appears:
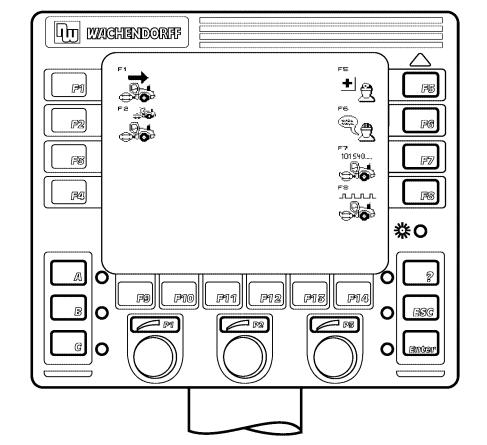
Press key “F8” to call up the screen page “Distance impulses”. The following screen appears:
More repair case for BOMAG,please refer to:BOMAG Trouble Repair