This post is for users of the Honda Diagnostic System (HDS) software on a PC with the Honda Interface Module (HIM) and a computer that has a USB port, but does not have an RS-232 DB 9-pin male serial port. A USB-to-serial adapter may be used to communicate between
the HIM and your computer. American Honda Motor Co., Inc. has tested these adapters:
- Belkin F5U409 Portable USB-to-serial adapter
- Micro Innovations USB to RS232 Serial Adapter
- Coolgear USBG-232 USB-to-serial adapter
All these adapters are designed to work with Microsoft Windows XP/2000 operating systems.
System Requirements
AMD or Intel Pentium 133MHz or faster computer equipped with a USB 1.1 or higher port
Windows 2000 or Windows XP operating system
Latest version of the HDS software
USB-to-serial DB 9-pin adapter
Software driver provided by the USB-to-serial adapter manufacturer
HIM
Newest Honda HDS V3.102.038 Free Download
How to Install Honda HDS Software for DIY
Important Note: The USB-to-serial adapter will be functional with the HIM only by mapping the USB-to-serial adapter to COM1.
Installing the Device
This section gives general guidance on how to install the USB-to-serial adapter under the Windows 2000 or Windows XP operating systems. It is best to read and follow the installation manual that came with your USB-to-serial adapter.
Note: It is strongly recommended you exit all Windows programs prior to installing your USBto- serial adapter software drivers. Installation procedures may be unique with each manufacturer. Always read and follow the manufacturer’s recommendations.
The following details how to install the Belkin F5U409 USB-to-serial adapter under Windows
- This procedure is representative of the installation of other USB-to-serial adapters and for computers using the Windows XP operating system.
1.Power-up your computer and boot to Windows. Make sure you have administrator privileges to install software on your system.
2.Install the driver software that came with your USB-to-serial adapter. Some manufacturers request that you install the software drivers prior to plugging in the USB-to-serial adapter.
Others request the USB-to-serial adapter be plugged in first, and have Windows browse for the software provided on a CD-ROM. During installation, Windows may prompt you that this device driver has not yet passed Windows 2000 or XP Logo compatibility. Click Continue
Anyway.
3.Windows will then start to install the software driver for your USB-to-serial adapter. Once installation is complete, Windows will prompt you that it has finished installing the software.
Click Finish to complete the setup. It is best to reboot your system before plugging in the
USB-to-serial adapter.
Verifying the Installation
This section details how to verify that the USB-to-serial adapter was properly installed. You also need to determine the COM port assignment made by Windows for the USB-to-serial adapter.
To verify if the device is properly installed and to determine the COM port assignment of the USB-to-serial adapter, do the following procedure.
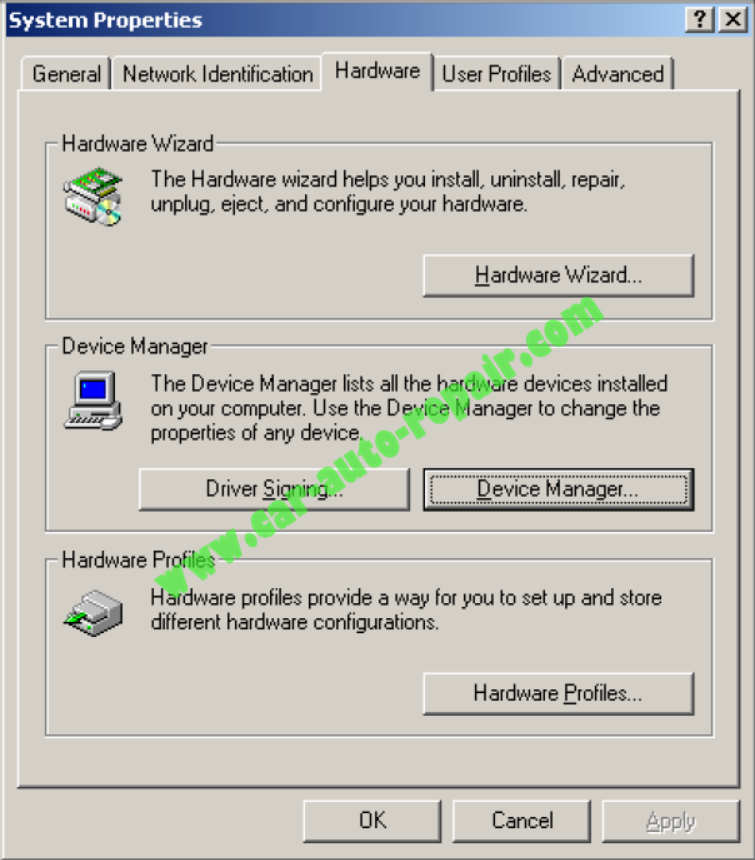
1.Click on Start, Settings, Control Panel, and then click on the System icon. Inside System Properties, click on the Hardware tab and click on the Device Manager…button.
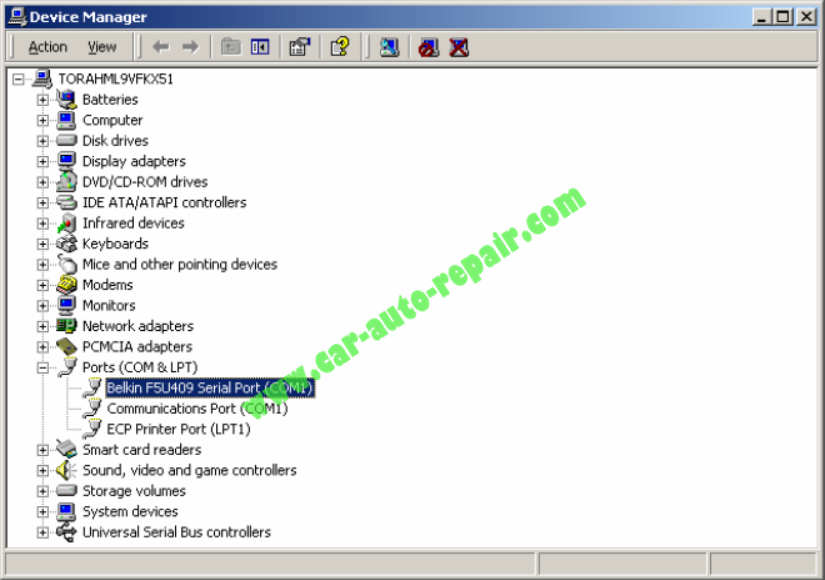
2.Double-click on Ports (COM & LPT). If the USB-to-serial adapter is already plugged in, you will see the USB-to-serial (COM4) device listed. This means that Windows has assigned the USB-to-serial adapter to the COM4 port.
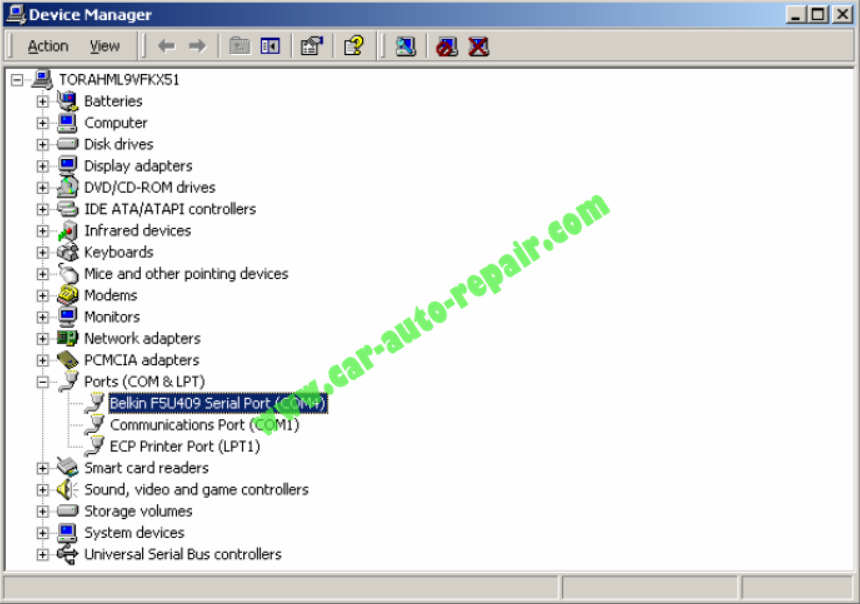
The COM port assignment of the USB-to-serial adapter varies, depending on your computer hardware setup and configuration. Windows checks which COM port is unused or free in your computer and automatically assigns a port number to the USB-to-serial adapter.
Important Note: The HIM functions only on COM1.
3.If the USB-to-serial adapter is not already on COM1, you must assign the COM port of the USB-to-serial adapter to the COM1 port number. Double-click on the USB-to-serial COM port to view properties.
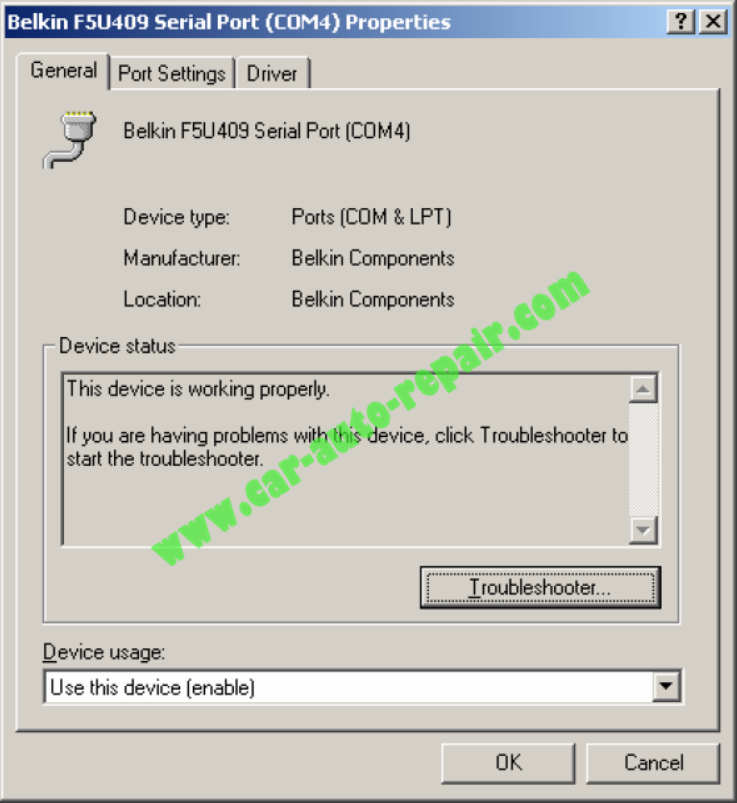
4.Inside the USB-to-serial COM port properties, click on the Port Settings tab. Click on the Advanced… button.
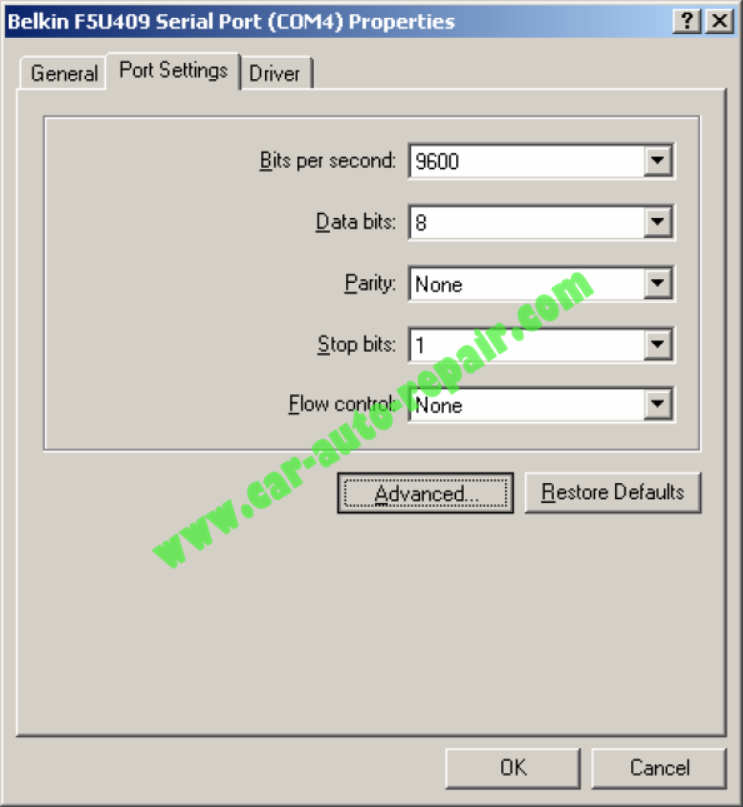
5.Inside the Advanced Settings screen, click on the COM Port Number. Example: If Windows assigned COM4 to your USB-to-serial adapter, you must reassign it to COM1. Click OK when finished.
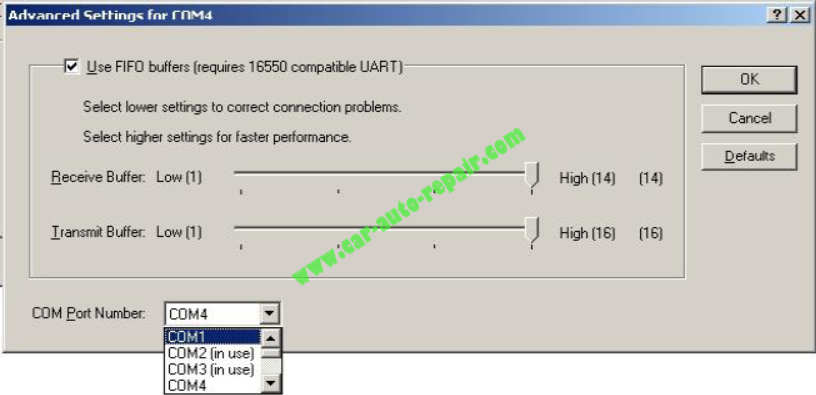
Note: Any other device that was previously assigned to COM1 may no longer function correctly.
Your USB-to-serial adapter should now be assigned to COM1.
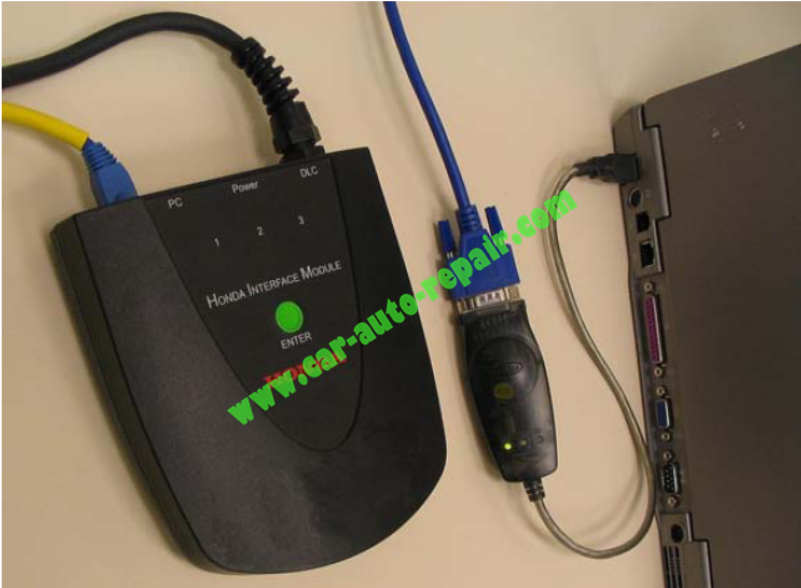
6.Once you have verified the USB-to-serial adapter is properly installed and assigned to COM1, you may now connect it to the HIM. Note that to avoid possible damage, the HIM must have power applied through either the DLC or its approved power supply (VET2001723) before
connection to the PC. Attach the serial connector of the HIM to the serial port of the adapter,and then plug in the USB connector to the USB port of your computer. Proceed with normal usage of the HDS with the HIM.
Uninstalling the USB-to-serial adapter Driver
In the event you need to uninstall the drivers for the USB-to-serial adapter, follow the user manual provided with the device. Generally you can go to the Control Panel, click on Add/Remove Programs, highlight the USB-to-serial adapter and click on the Change/Remove button. Confirm the deletion by clicking on the Yes button. Click Ok to finish. If the COM1 port was used for a device prior to installing the USB-to-serial adapter, the port may need to be reset for that device.
