This instruction show you guide on how to install 4JJ1 engine for ISUZU euro 4 N series truck.If you want more about ISUZU truck cases,please refer to::ISUZU Trouble Repair.
Related Contents:
ISUZU US-IDSS II 2024 2019 Diagnostic Software Free Download
How to Remove 4JJ1 Engine from ISUZU N-Series Truck
Procedures:
1.Install the engine assembly to the vehicle.
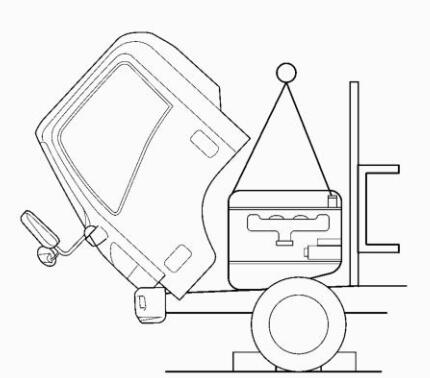
Install the hoist wire to the engine hanger and hoist to lift the engine.
Operate the hoist to move the engine to the installation position.
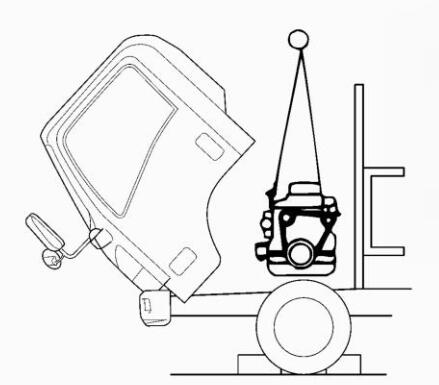
Turn the engine 90 and slowly lower it to the engine installation position.
At this time, slowly operate the hoist so that the transmission side is low, while pulling to the rear of the engine.
2.Install the engine mount.
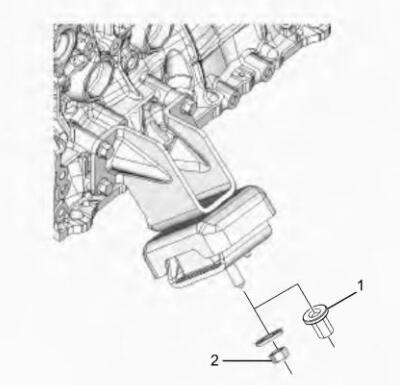
Align the engine mount to the hole in the engine mounting cross member, and tighten at the specified torque.
Tightening torque: Leaf rigid suspension(1)122 N-m(12.4 kg-m/90 lb-ft)
Wishbone suspension (2)94 N·m(9.6 kg-m/69 lb-ft)
3.Connect the fuel hose.
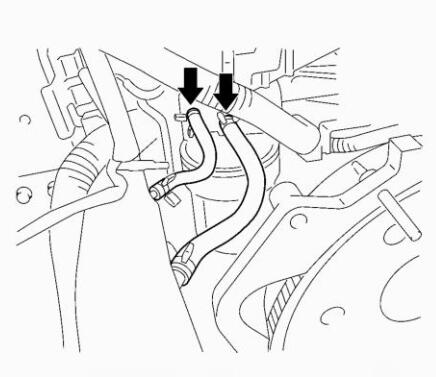
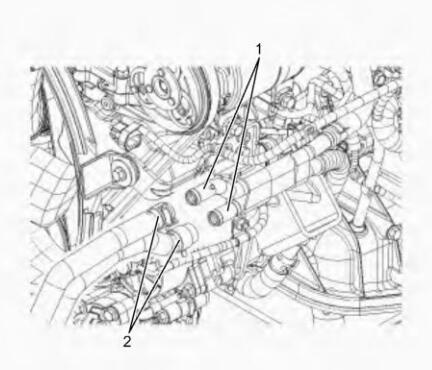
4.Install the heater hose (2) to the heater pipe(1).
5.Install the power steering pump.
Tightening torque:25 N-m (2.5kg-m/18 Ib-ft)
6.Install the radiator lower hose.
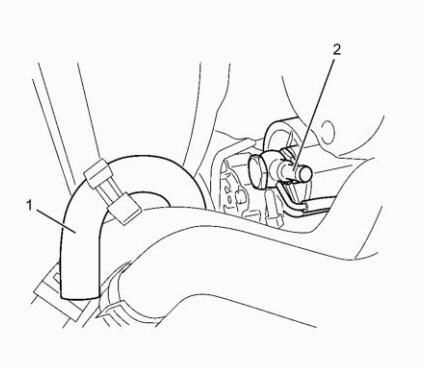
7.Install the vacuum hose(1) to the vacuum pump(2).
8.Install the engine ground cable to the frame.
9.Install the A/C compressor.
Install the A/C compressor as shown in the diagram, and tighten at the specified torque.
Tightening torque:25 N-m(2.5kg-m/18 Ib-ft)
Install the drive belt and adjust its tension using the adjust bolt of the tension pulley.
For details on adjusting belt tension, Refer to”Drive Belt”in Section 1C, Engine Cooling.
10.Install the cooling fan assembly.
Tighten the fan clutch to the fan pulley at the specified torque.
Tightening torque:8 N.m(0.8kg-m/69 lb-in)
11.Install the fan guide.
12.Install the radiator upper hose.
Tighten the radiator hose clamp.
Tightening torque:5 N-m(0.5kg-m/43 lb-in)
13.Install the air intake duct and hose.
NOTE:Firmly insert the hose without any twisting or misalignment, and tighten the clamp to the specified torque.
Install the duct and hose between the intake throttle valve and intercooler.
Use a new hose clamp, align it with the marking.
Tightening torque:8 N-m(0.8 kg-m/69 lb-in)
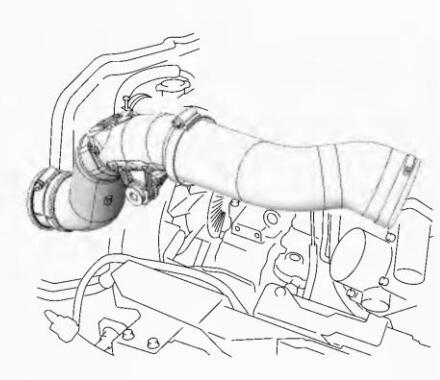
14.Connect the ECM connector and clip.
15.Install the connector(1) of the boost sensor and the harness clip.
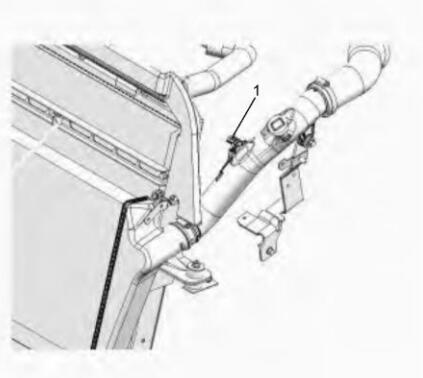
16.Install the air duct and PCV hose.
Use a new duct clamp, align it with the marking, and tighten it at the specified torque.
Tightening torque:8 N-m(0.8kg-m/69 lbin)
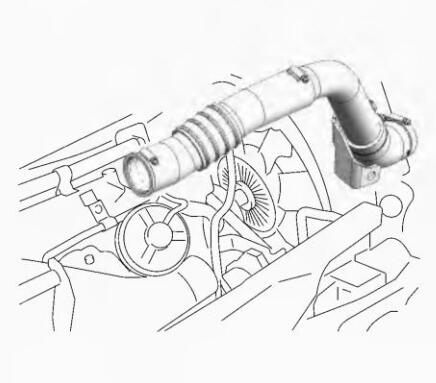
17.Install the air intake pipe and hose.
NOTE: Firmly insert the hose without any twisting or misalignment, and tighten the clamp to the specified torque.
Install the pipe and hose between the turbocharger and intercooler.
Use a new hose clamp, align it with the marking.
Tightening torque Intercooler side:8N-m(0.8kg-m/69 lb-in)
Turbocharger side:6.4N-m (0.65kg-m/56.4 lb-in)
NORMA W3 Clamp
8N-m(0.8kg-m/69lb-in)
NORMA W1 Clamp
18.Install the engine harness.
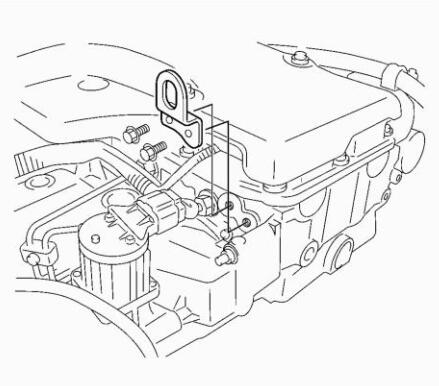
19.Remove the engine hanger.
Remove the engine hanger on the rear left side of the engine.
After removing the engine hanger, insert the EGR valve harness clip into the bolt hole.
20.Install the transmission.
Refer to “Smoother Transmission Assembly”in Section 5B, Automatic Transmission (Smoother) for details on the Smoother vehicles.
Refer to “Transmission Assembly”in Section 5C, Manual Transmission, for details on M/T vehicles.
21.Install the front exhaust pipe and exhaust brake.
Refer to”Exhaust Pipe”and “Exhaust Brake”in Section 1G, Engine Exhaust.
22.Install the starter.
Refer to “Starter Motor”in Section 1E, Engine Electrical.
23.Refill the engine coolant.
24.Connect the battery cable negative terminal.