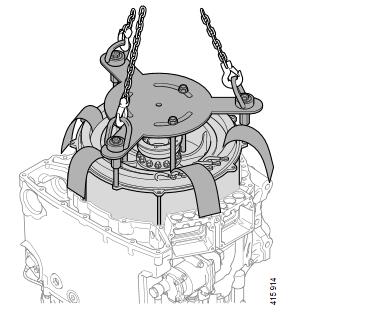
Here is the step-by-step guide on how to remove electric machine for Scania C,K series buses 2020.
Related Contents:
2024.07 Scania SDP3 V2.61.2 V2.40 Diagnostic Software Free Download
2023 2018 Scania Multi EPC Parts Catalogue Free Download
Procedures:
1.Remove the gearbox from the vehicle.
2.Fit the gearbox on the engine stand.
3.Remove the cover of the TMS control unit.
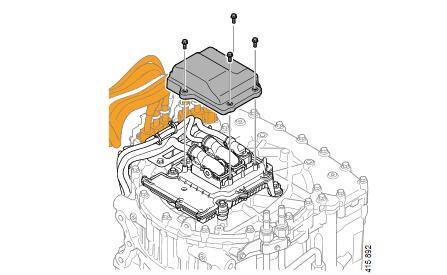
4.Loosen the bracket and the TMS control unit connectors. Hang the bracket and cable harness to one side.
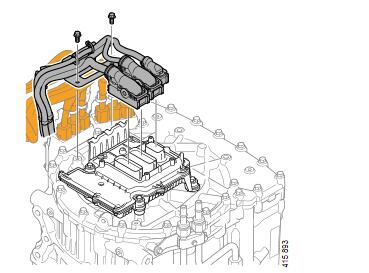
5.Remove the TMS control unit.
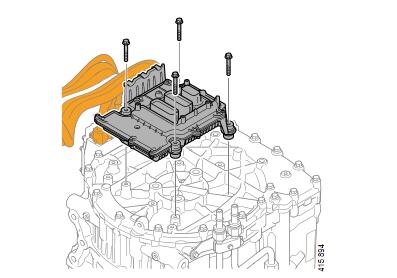
6.Remove the covers for voltage class B.
Check the warning stickers on the covers.
If the stickers are damaged: Fit new warning stickers.
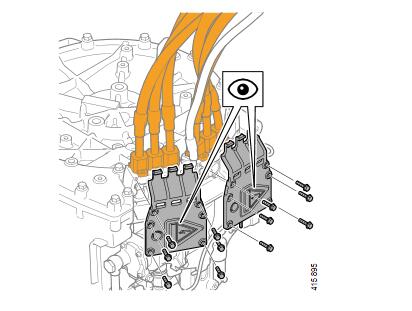
7.Remove the equipotential bonding cable.
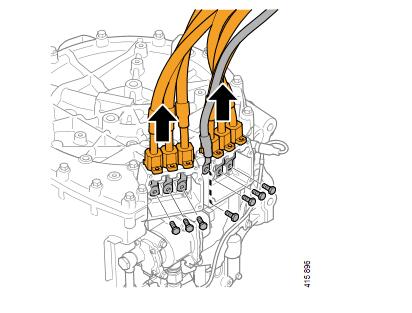
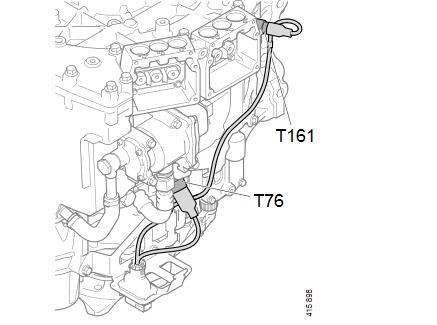
8.Loosen the temperature sensor (T161) and position sensor (T76).
9.Remove the centre screws.
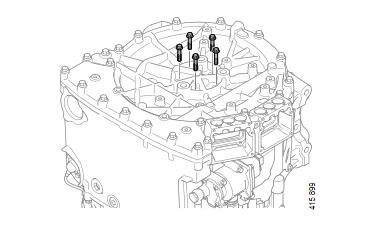
10.Fit 5 x 2 693 448 Guide pins.
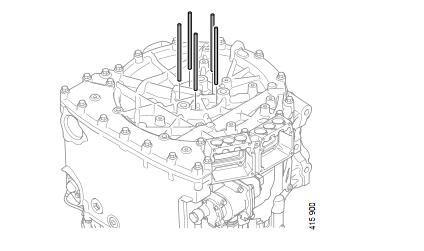
11.Remove the screws on the cover.
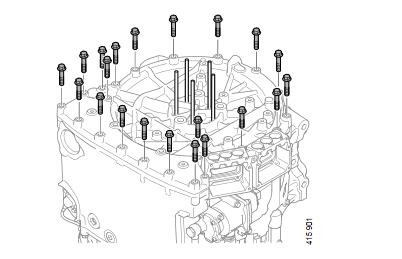
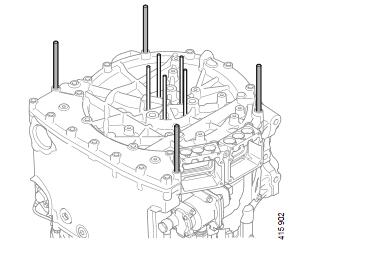
12.Fit 4 x 2 693 448 Guide pins in the electric machine housing.
13.Screw on the 3 x 2 693 446 puller screws by hand.
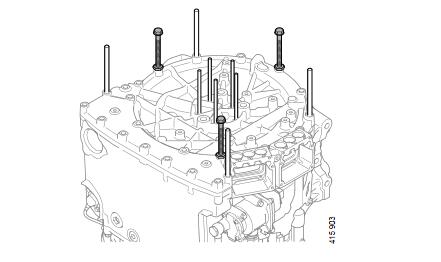
14.Press up the cover by cross-tightening 2 693 446 puller screws.
15.Lift off the cover when it is sufficiently loose.
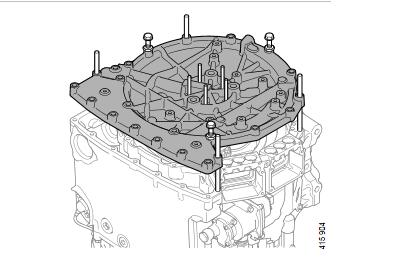
16.Remove 2 693 448 Guide pins.
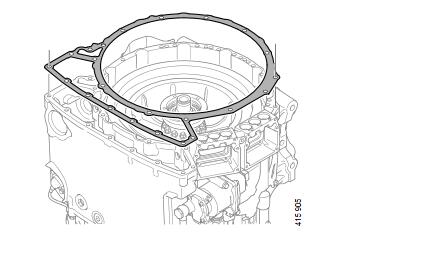
17.Remove the gasket.
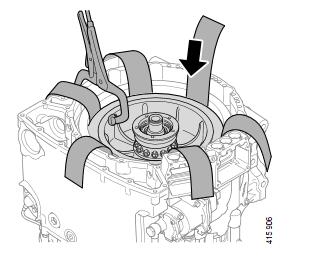
18.Fit 2 693 875 plastic strips between the rotor and stator to prevent damage during removal.
If 2 693 875 plastic strips are difficult to fit, use a weld rod to press the rotor in a specific direction to free up space.
19.Unscrew the stator’s ring terminal connections. Remove the braces.
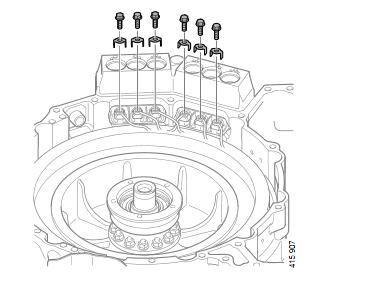
20.Disconnect the T161 temperature sensor.
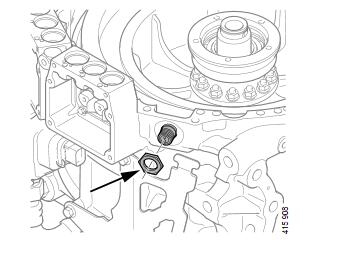
21.Remove the insulator plates. Press out the busbar and renew the O-rings.
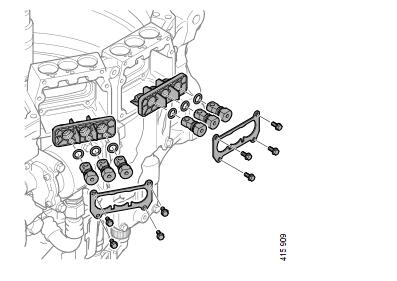
22.Remove the stator’s socket head screws.
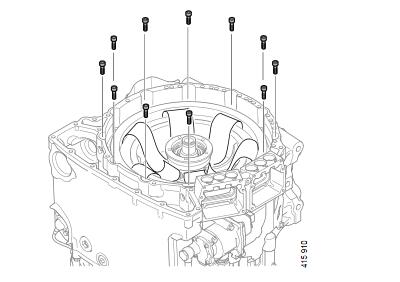
23.Fit 5 x 2 693 875 Guide pins.

24.Fit 2 693 445 Lifting bar in the stator.
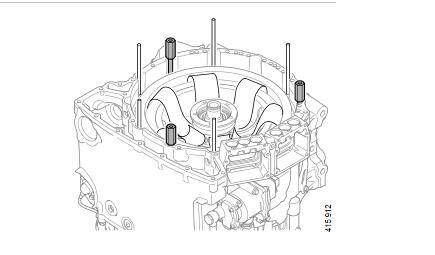
25.Fit 2 693 450 Lifting bar and 2 693 444 Lifting accessory.
Fit three 2 568 873 Rotating lifting eye, M10 on 2 693 444 Lifting accessory.
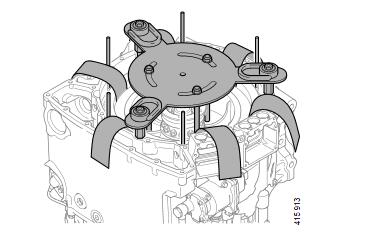
26.Use 2 693 597 Lifting accessory and carefully lift the rotor and stator out of the electric machine housing using an overhead hoist.
