MTU engine wiring harness W2 and W3 will be damaged by some unknown reason or service life end,you need replace a new one.Here is the instruction show you guide on how to remove
Related Contents:
2022 MTU DiaSys 2.74 2.72 Engine Diagnostic Software Free Download
MTU Engine Diagnostic USB-to-CAN Adapter with Cables
Removing engine wiring harnesses W2 and W3
Use the lettering kit (near ECU connector) to identify wiring harness and determine wiring route.
Release bayonet connector at ECU 4 (if necessary using pliers) and withdraw.
Release plug-in connections of connected sensors or actuators and remove.
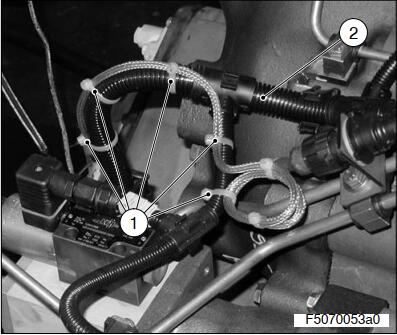
Remove cable clamps (1) which are secured to wiring harness (2) to be changed.
Note: Note position of cable clamps. The cable clamps must be installed in the position they were in prior to disassembly.
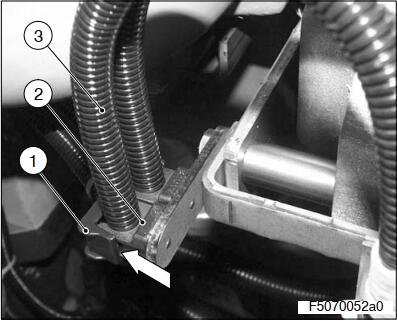
Using a screwdriver, open sealing clips (1) of all cable fasteners (2) and remove (arrow indicates application point of screwdriver).
Withdraw wiring harness (3) from all open cable fasteners.
Carefully remove wiring harness.
Removing engine wiring harness W4
Use the lettering kit (near ECU connector) to identify wiring harness and determine wiring route.
Release bayonet connector at ECU 4 (if necessary using pliers) and withdraw.
Release plug-in connections of connected sensors or actuators and remove.
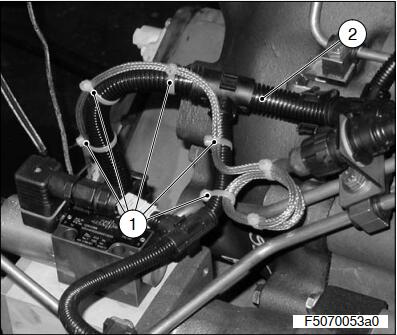
Remove cable clamps (1) which are secured to wiring harness (2) to be changed.
Note: Note position of cable clamps. The cable clamps must be installed in the position they were in prior to disassembly.
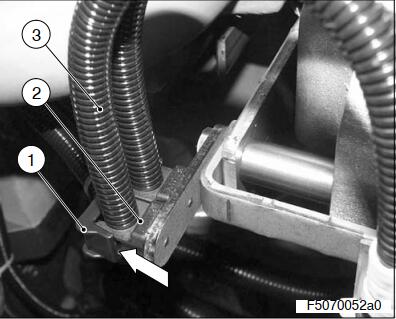
Using a screwdriver, open sealing clips (1) of all cable fasteners (2) and remove (arrow indicates application point of screwdriver).
Withdraw wiring harness (3) from all open cable fasteners.
Remove cylinder head covers
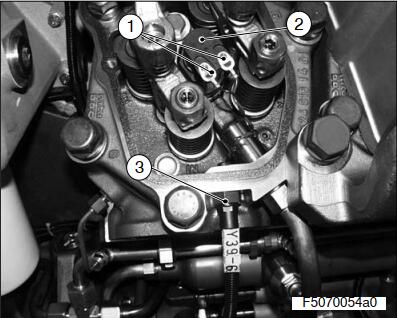
Release cable terminals (1) and withdraw from injector (2).
Release cable entry (3) and carefully withdraw connecting wires from cable entry.
Remove wiring harness.
More topic about MTU,please refer to https://www.car-auto-repair.com/tag/mtu-engine-repair/