This instruction show you guide on how to remove preconcave for CLAAS LEXION 480 combine harvesters.
Related Contents:
CLAAS CDS 7.5 Diagnostic Software 2021 2020 Free Download
CLAAS 4 CAN Diagnostic Interface
Claas WebTIC Offline Repair & Service 2024 2015 Free Download
Procedures:
Removing the preconcave
Lower the concave to its lowest position.
Removing the feed rake conveyor, see page 3.1.1
Place stands under the front axle and ensure that it is being supported in a safe manner.
Remove both front wheels.
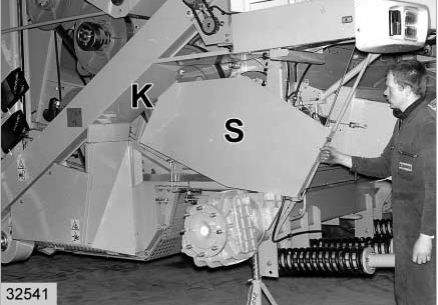
Remove the guard (S) and the mud guards (K) from the right-hand side.
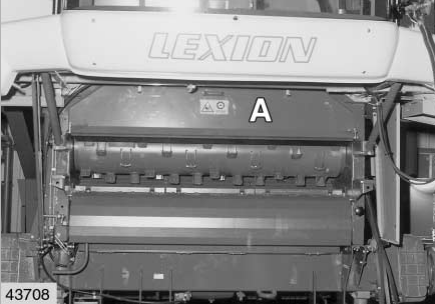
Remove the drum inspection cover (A).
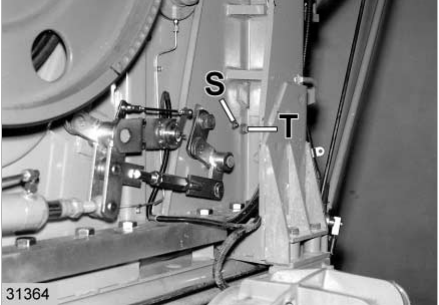
Remove the hex. bolts (T) from both sides of the machine.
Remove the screw plug (S) from both sides of the machine. Should the machine be fitted with the maize options, remove the feed plate for the stone trap.
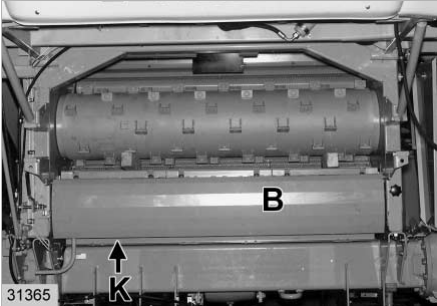
Remove the feed plate (B) along with the cover (K).
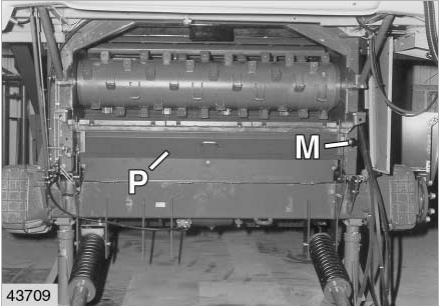
Unscrew the turn lock nut (M) and fold down the stone trap (P).
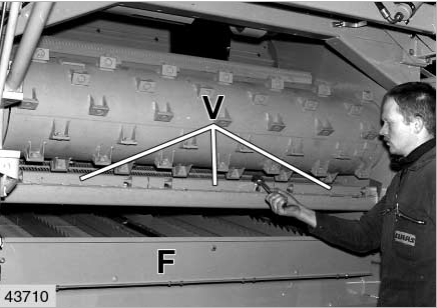
Remove the hex. bolts securing the preconcave segments (V).
Raise the segments and remove them from the machine.
Unscrew the cover (F) from the preparation floor and fold it open.
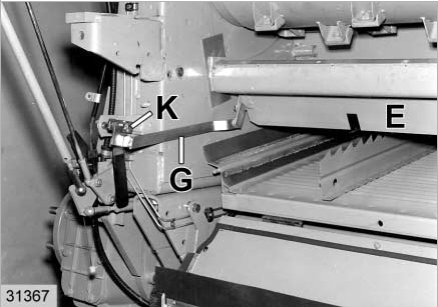
Unscrew hex. bolt (K) in order to remove brace (G).
Lift both disawner plates (E) out at the front of the machine.
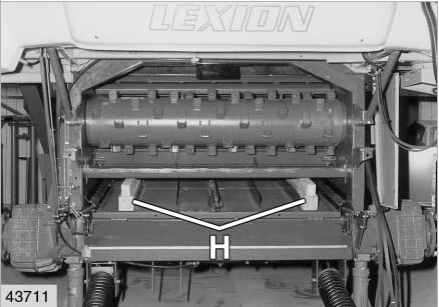
Support the underside of the preconcave with pieces of squared timber (H) of approx. 170 mm height.
Pull out the split pins from the mounting plates (L) of the main concave and loosen the set collars (R).
Remove the mounting plates (L).

Remove the bolts (A and B) from the centre and the front concave suspension on the right- and left-hand side.

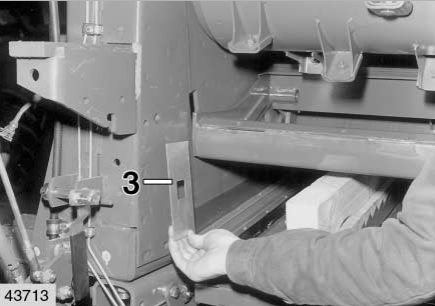
Pull out the sealing plates (3 and 7).
At the front sealing plates (3), also remove the wear strips (4).
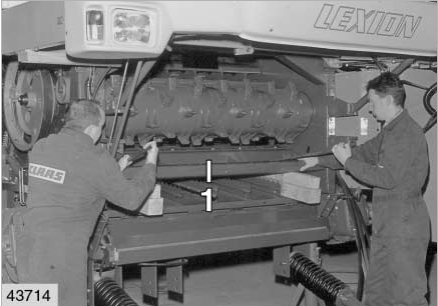
Raise the preconcave (1) at the rear and push it over the edge of the main concave.
Pull the preconcave out slowly towards the front on the squared timber.
More repair case for CLAAS,please refer to CLAAS Trouble Repair