This instruction show you guide on how to adjust and replace shift cable for ISUZU F-series truck.
Inspection Procedure
1 Turn the ignition to OFF.
2 Block the wheels.
3 Confirm that full forward travel P (park) position can be obtained.
4 Press shifter lock release button.
5 With the transmission shift detent controlling the shift lever position, place shift lever indicator into N (neutral) position.
6 Observe shift lever indicator position. If red indicator band is centered in the N position, no further adjustment is required.
Adjustment Procedure
Note: The adjustment for the shift cable is performed at the shift housing end of the cable. The cable is held in place by a clip and washer.
1 Remove the fasteners securing the shift control housing to the shift control, and position the control housing out of the way.
2 Disconnect the shift cable from the shift control by removing the pin and washer then move the cable end off the pivot pin on the shift housing.
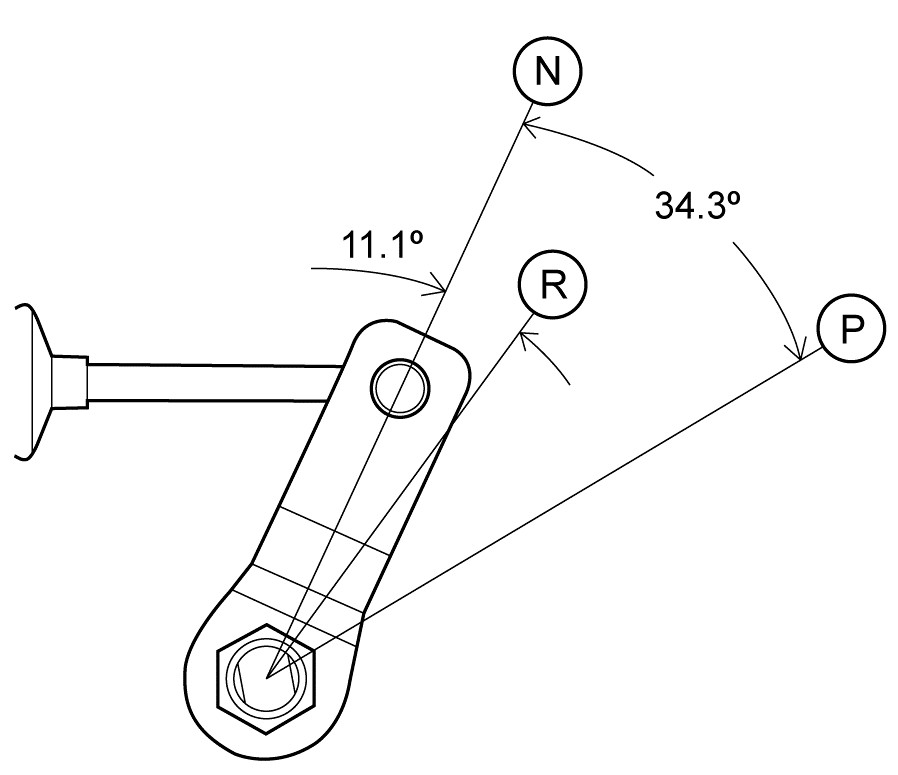
3 At the transmission rotate the transmission selector shaft lever to the Neutral (N) position.
4 Move the shift lever to the neutral detent position. Note: You may need to manually override BTSI to move the shift lever.
5 While holding the cable end eye adjust the turnbuckle so that the cable end eye fits freely over the pivot pin on the shift control.
6 Install the washer and clip.
7 Tighten both jam nuts on the adjusting turnbuckle.
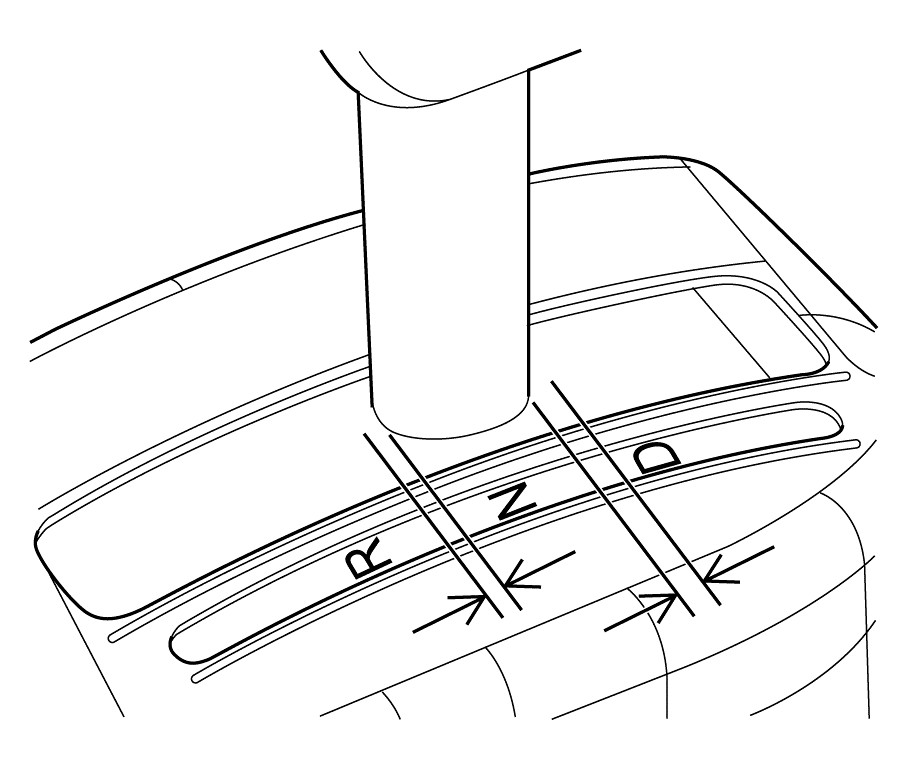
Note: The backlash is defined as the amount of shift lever travel measured at the PRNDL lens before the transmission selector starts to move.
8 Verify the backlash of the shift lever is less than 2mm when the lever is pushed from the N towards the R direction with the shift button depressed fully.
9 Verify the backlash of the shift lever is less than 4mm when the lever is pushed from the N towards the D direction with the shift button depressed fully.
Shift Cable Replacement
Removal Procedure
1 Turn the ignition to OFF.
2 Block the wheels.
3 Move the shift lever to the neutral position.
4 Remove the fasteners securing the shift control housing to the shift control, and position the control housing out of the way.
5 Remove the fasteners and clips securing the shift cable to the shift control.
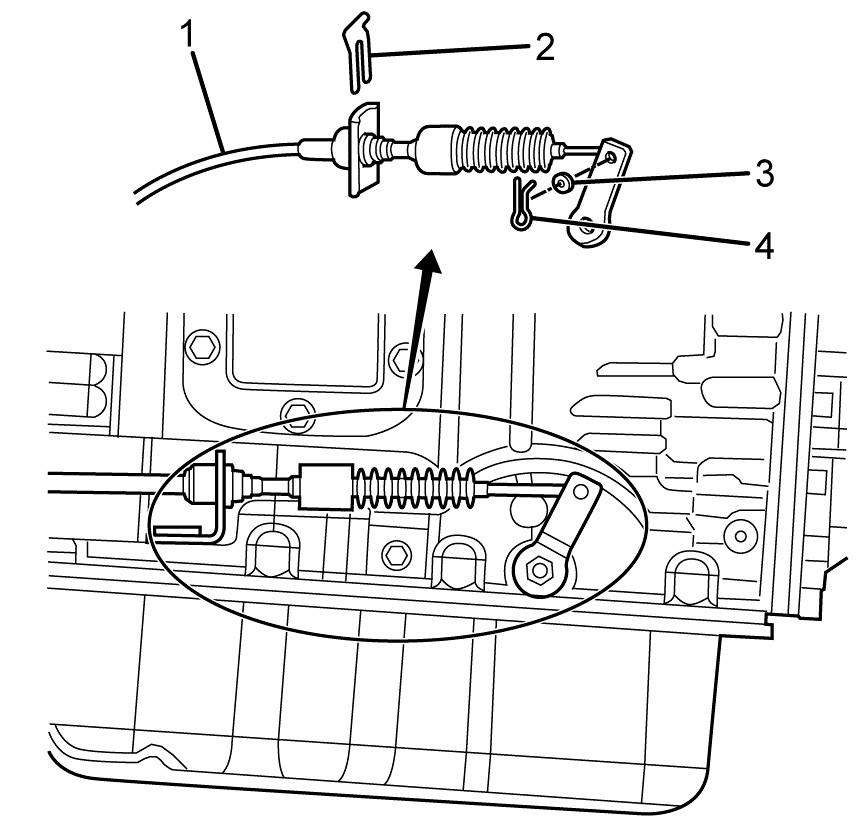
6 Remove the cable clip (2), clevis pin (4), and washer (3) securing the shift cable (1) to the transmission shift lever.
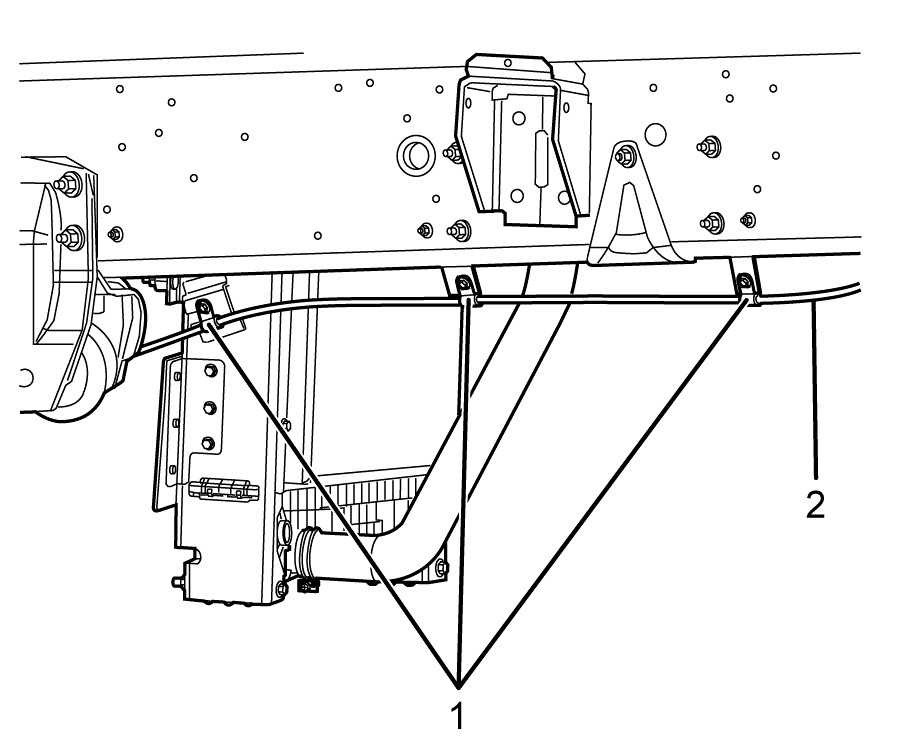
7 Note the positions of the clamps securing the shift cable to the vehicle. Remove the bolts and clamps (1) securing the shift cable (2) to the frame rail and brackets.
8 Remove the grommet securing the shift cable to the cab.
9 Remove the shift cable.
Installation Procedure
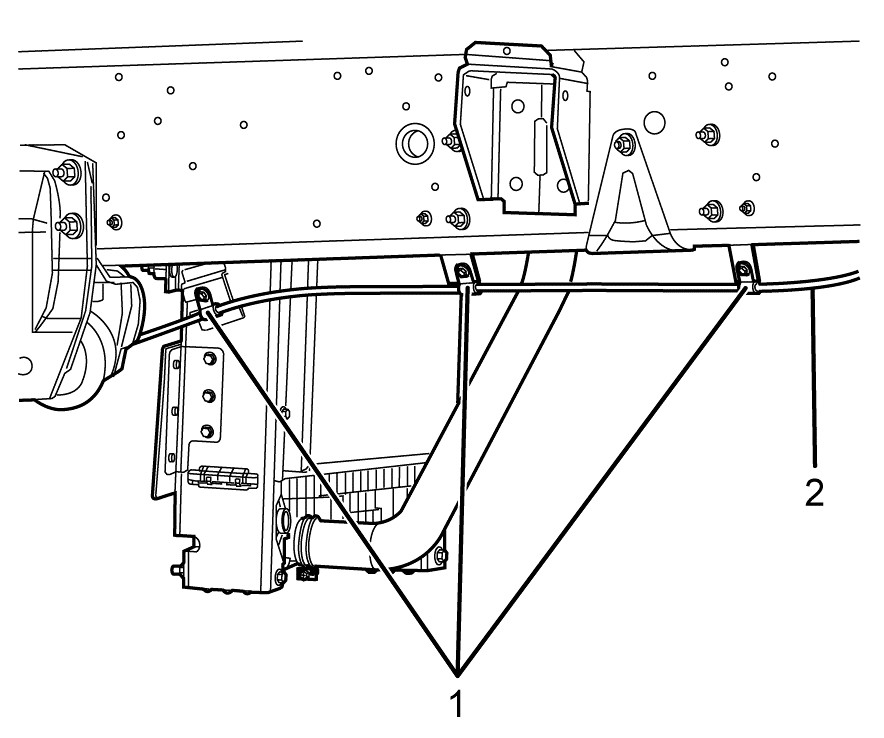
1 Position the new shift cable in the original position.
Notice:
- Ensure the shift control lever and the transmission shift lever are in the mechanical neutral position. Mechanical neutral at the transmission is 2 clicks away from the bottom most position.
- Refer to Fastener Notice .
2 Install the bolts and the clamps (1) in order to secure the shift cable (2) to the frame rail and brackets.
3 Install the grommet securing the shift cable to the cab.
Tighten the bolts to 20 N-m (15 lb ft).
4 Install the fasteners and clips in order to secure the shift cable to the shift control.
Tighten the nuts to 22 N-m (16 lb ft).
5 Adjust the shift cable. Refer to Shift Cable Adjustment .
6 Install the fasteners in order to secure the shift control housing to the shift control.