This instruction show you guide on how to remove and install injector for ISUZU N series truck with 4JJ1 engine Euro 4.
Related Contents:
2023 2019 Isuzu G-IDSS Diagnostic Software Free Download (Troubleshooting Guide Included)
ISUZU IDSS Diagnostic Adapter(Support Programming/Flashing)
Procedures:
Including the inside of the injector, the holes and gaps that are the fuel paths for the fuel system have anextremely precise finish. Therefore, because there is the possibility of damage if foreign material becomes mixed in, cover the cap after removing parts, etc. to prevent the entry of foreign material.
Removal
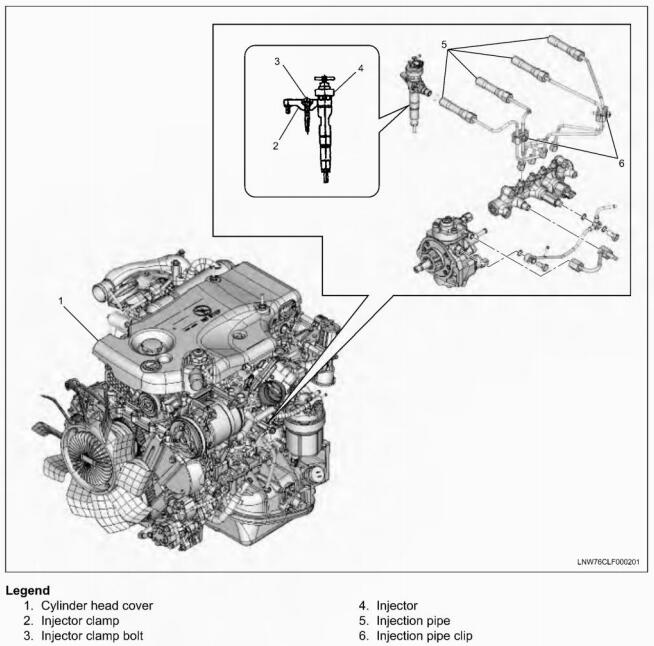
1.Remove the cylinder head cover.
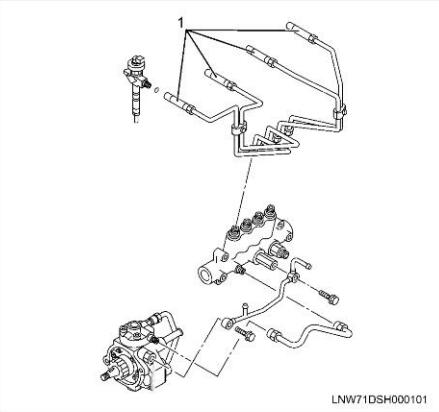
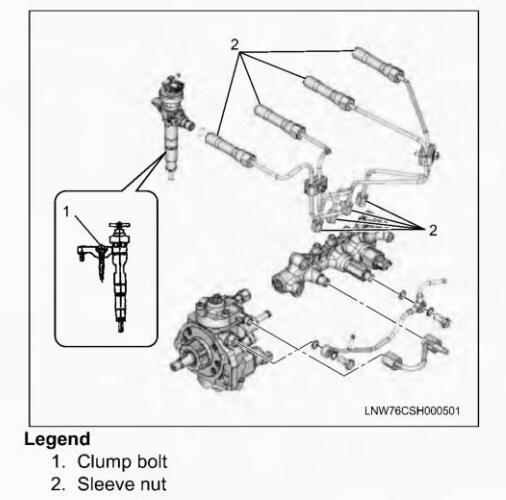
2.Remove the sleeve nut(1) of the injection pipe from the injector.
NOTE: Do not reuse the injection pipe.
3.Remove the injector.
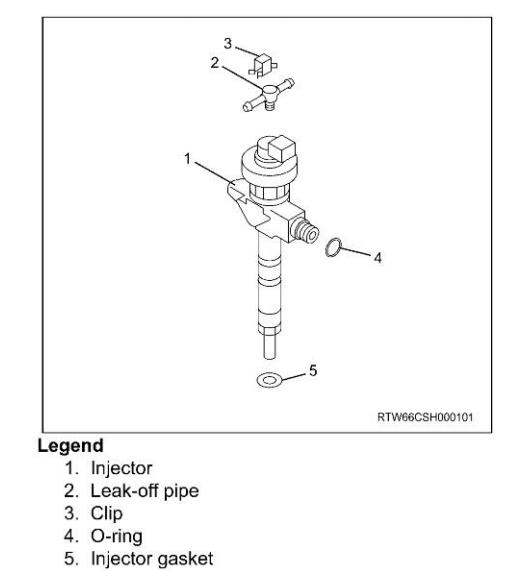
NOTE: Do not reuse the clip, injector gasket and O-ring.
NOTE:
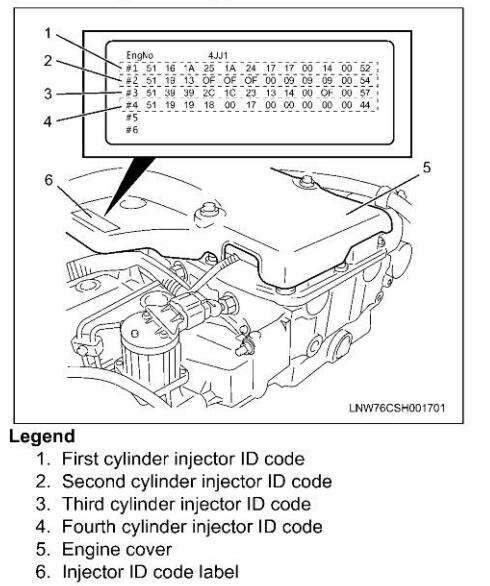
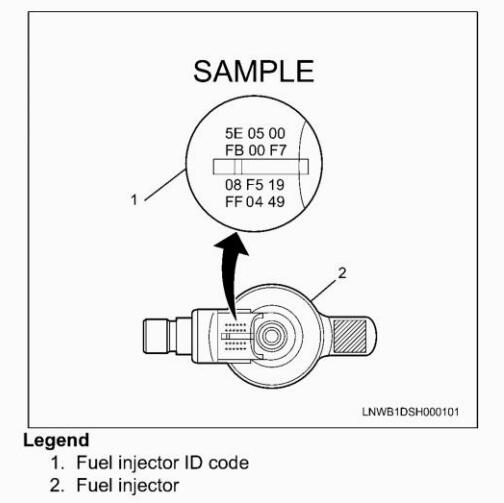
The injector ID code identifies the injectors.Do not remove the injector ID codes from the injectors.
Absolutely never touch the injector solenoids because that can hinder their performance or cause damage.
Store the removed injector with the cylinder number on it.
When you replace the injector, use a black pen, etc. to erase the ID code of the replaced cylinder number on the injector ID code label (6) attached to the engine cover(5).
Installation
1.Install the O-ring to the injector.
NOTE:
Apply engine oil to the O-ring when installing and take care not to damage it.
Do not reuse the O-ring.
2.Install the injector gasket to the cylinder head.
NOTE:
Clean any foreign material or dirt from the cylinder head and injector before assembling the injector gasket.
Do not forcibly push the injector gasket into the injector as it will be pushed until it hits the end of the injector during clamp tightening.
Do not reuse the clip and injector gasket.
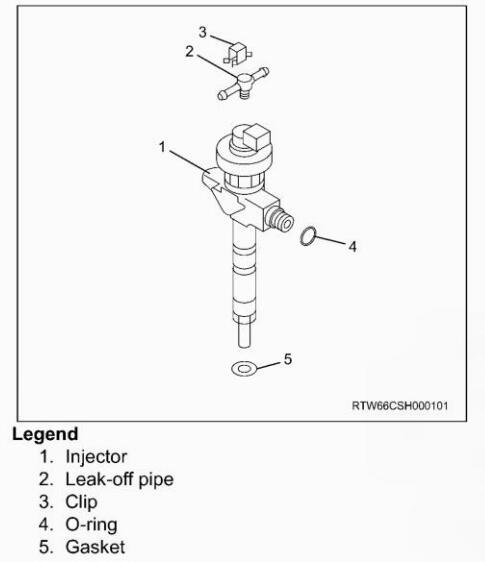
3.Install the injector clamp as indicated in the diagram.
Apply engine oil to the threaded portion and seat surface of the injector clamp bolt.
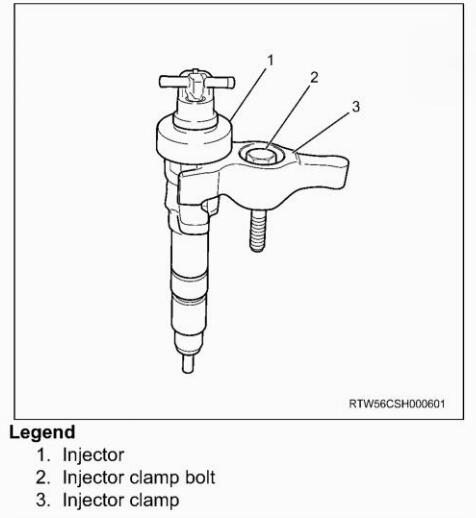
NOTE: Do not reuse the clip, gasket or O-ring.
4.Install and temporarily tighten the injector, injector clamp, and clamp bolt to the cylinder head.
5.Install the injection pipe.
Apply engine oil to the injector side sleeve nutthreaded portion of the injection pipe and the O-ring of the injector.
6.Lightly tighten the sleeve nut with a hand so that it is attached airtight.
7.Tighten the injector clamp bolt at the specified torque.
Tightening torque:26 N-m(2.7kg-m/20 lb-ft)
8.Tighten the injection pipe clip at the specified torque.
Tightening torque:8 N.m(0.8kg-m/69 lb-in)
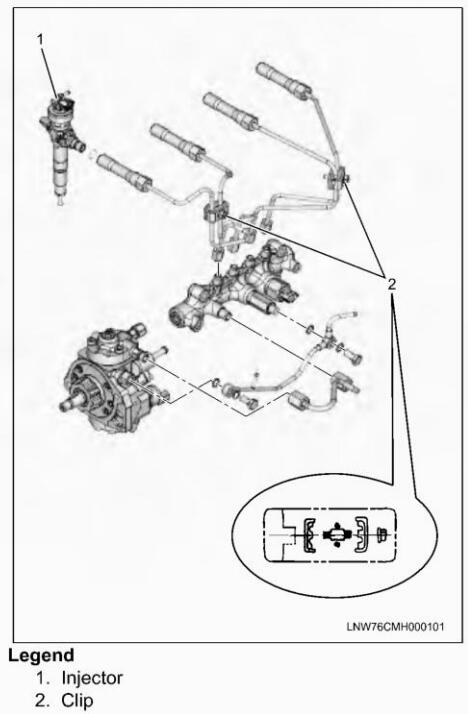
9.Tighten the sleeve nut of the injection pipe at the specified torque.
Tightening torque: Injector side:30 N-m(3.1kgm/22 lb-ft)
Common rail side:25 N-m(2.5kg-m/18 lb-ft)
10.Record all numbers of each cylinder on the harness connector housing.The correct order for the fuel injector ID codes of the following illustration is as follows:
5E0500 FB 00 F7 08 F5 19 FF0449
11.Install the cylinder head cover.