This post show you guide on how to assembly aftercooler for Komatsu PC130 excavator.For more Komatsu case,please refer to:Komatsu trouble repair.
All workshop manuals and parts you can get it here:
Komatsu CSS Full Set 2018 2014 Parts Viwer Free Download
Remove and Install Front Oil Seal for Komatsu PC130-8 Excavator
Procedures:
Note:Disconnect the negative (–) terminal of the battery beforehand.
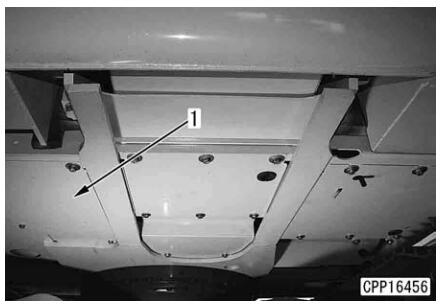
1.Remove lower cover (1).
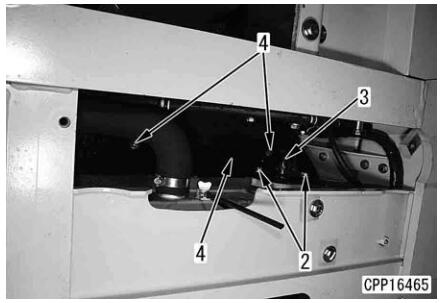
2.Remove 2 mounting bolts (2) and disconnect the air aftercooler lower hose (3).
3.Remove 2 mounting bolts (4) and remove plate (5).
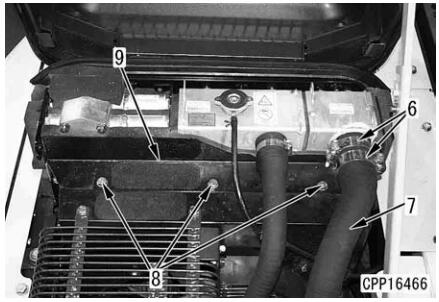
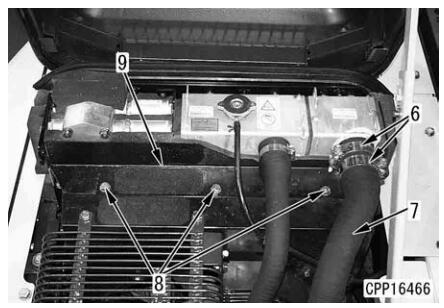
4.Loosen 2 clamps (6) and disconnect the air aftercooler upper hose (7).
5.Remove 3 mounting bolts (8) and remove plate (9).
6.Remove 2 air aftercooler mounting bolts (10).
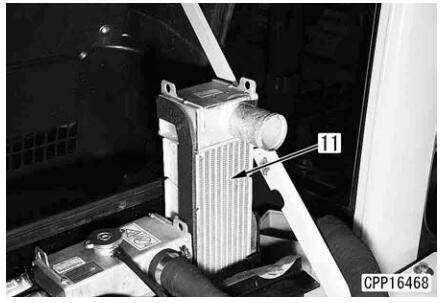
7.Pull out air aftercooler (11).
Take care not to damage sponge around the aftercooler.
Installation
Carry out the installation in the reverse order of removal.
Take care not to damage sponge on the sides when installing the aftercooler.
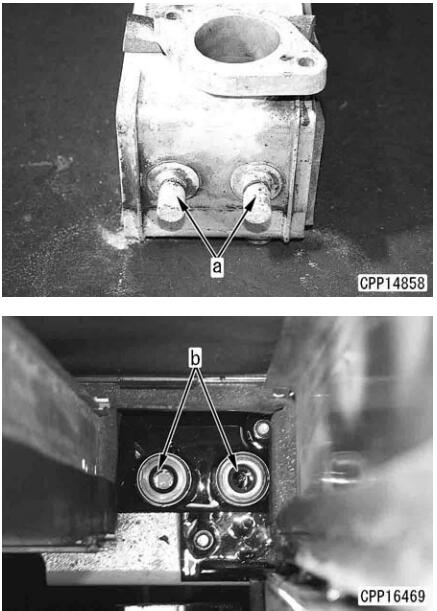
When installing the radiator assembly, align the convex portion (a) on the bottom of the air aftercooler with the concave portion (b) on the machine.
If air aftercooler upper hose was disconnected by losening its clamp. Install the MIKALOR clamp according to the following procedure.
Use a new clamp.
Align the hose to the original position (marking position).
Depth of insertion: 85 mm
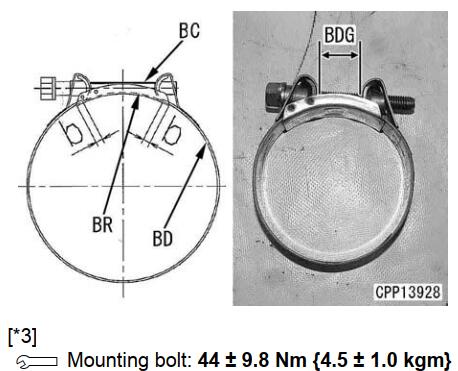
Set the bridge (BR) under the clamp bolt and lap it over band (BD) at least (b) reaches 5 mm.
Do not use an impact wrench, when tighten the clamp.
2 Clamp bolt (BC): Lubricanting oil (THREEBOND PANDO 18B)
When reusing the hose
Install the clamp to the clamp mark made,on the hose.
3 Tighten to torque of at least 6 Nm {0.6kgm}
When using a new hose
Tighten until dimention (BDG) is 7 – 10 mm
