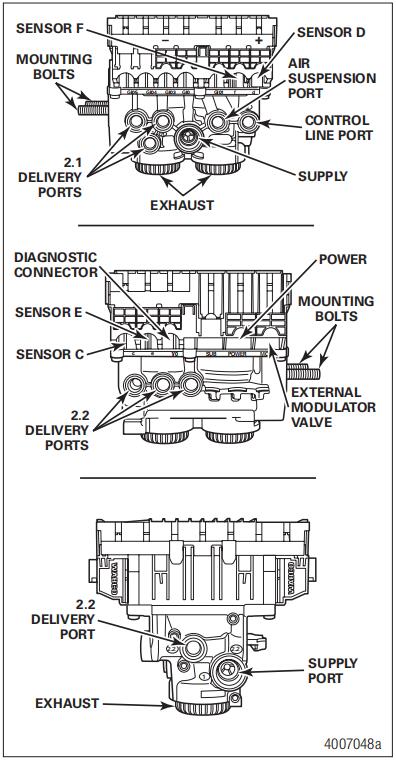
This instruction show you guide on how to assemble ECU/Valve for Wabco RSSPLUS trailer.
Related Contents:
Meritor Wabco Toolbox v13.6 v12 Diagnostic Software Download
Procedures:
WARNING
Release all pressure from the air system before you disconnect any components. Pressurized air can cause serious personal injury.
Remove the Old ECU/Valve Assembly
1.Release all pressure from the air system.
2.Attach labels to identify all air lines.
3.Disconnect the air lines from the ECU/Valve Assembly.
4.Disconnect the power cable, additional relay valve cable (if used), and all sensor cables from the ECU/Valve Assembly.
5.Remove the ECU/Valve Assembly from its mounting location.
Loosen and remove the two mounting bolts and lock nuts that hold the assembly to the cross member or bracket. Remove the assembly.
6.If the assembly being replaced is under warranty, please return it to the trailer OEM for replacement.

Install the New ECU/Valve Assembly
NOTICE
When a sensor cable is not plugged into a sensor connector, the black cap must remain in the connector to protect it from dirt and contamination.
The ECU/Valve Assembly is supplied with black protective caps in each sensor connector
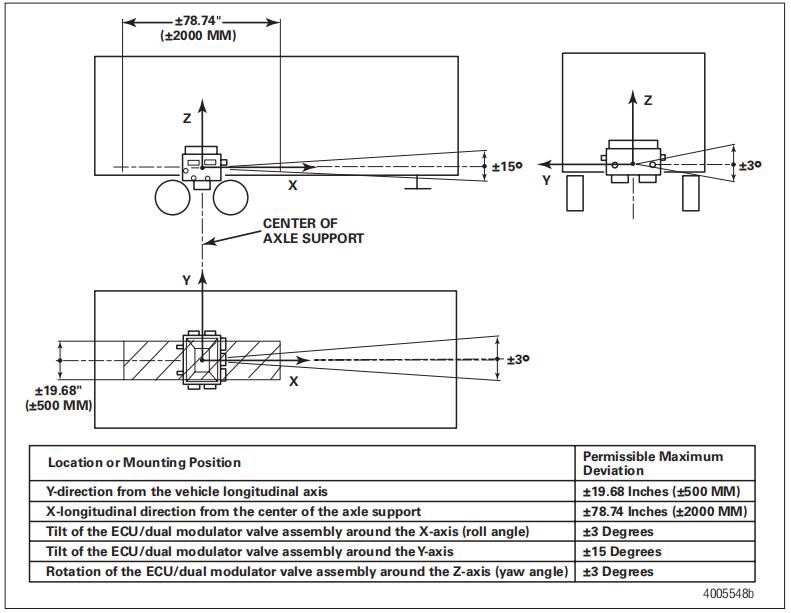
Mounting RSSplus™ ECU to Cross Member of Vehicle — Bracket Not Supplied
When mounting the ECU/dual modulator valve assembly to the trailer cross member, refer to SAE specification J447, Prevention of Corrosion of Motor Vehicle Body and Chassis Components. Follow all recommendations and procedures. Your supervisor should have a copy of this specification. Wabco Toolbox 13.6 Diagnostic Software

Preparation
Before beginning the installation procedure, perform the following.
Inspect the ECU/dual modulator valve assembly for damage that may have occurred during shipping or storage.
Look for crushed or bent connectors.
Verify that the retainer clips have not been bent or otherwise damaged.
Do not install a damaged ECU/dual modulator valve assembly. Notify your supervisor, or contact
WABCO if there is any apparent damage.